背景
简介
Soot 最初由麦吉尔大学的 Sable 研究小组开发。关于 Soot 的第一篇论文发表于 1999 年的 CASCON 大会。自那时起,Soot 得到了来自研究界内外众多人士的贡献。目前,Soot 的维护工作由帕德博恩大学 Heinz Nixdorf 研究所的 Eric Bodden 软件工程小组负责。
Soot 将程序转换为IR,这里主要提供了四种用于分析和转换 Java 字节码的中间表示:
- Baf:字节码的简化表示,易于操作。
- Jimple:一种适合优化的类型化 3 地址中间表示。
- Shimple:Jimple 的 SSA 变体。
- Grimp:Jimple 的聚合版本,适用于反编译和代码检查
三地址码想必大伙都知道,不过SSA确实没提过,这里简要的介绍一下,SSA(Static Single Assignment,静态单赋值)是一种中间表示(Intermediate Representation, IR)形式,在编译器和程序分析工具中被广泛应用,尤其适合进行优化和数据流分析。
SSA 的基本原则是:每个变量在整个程序中只被赋值一次,每次赋值都创建一个新的变量版本。
比如对于下面的代码:
a = 1;
a = a + 2;
b = a * 3;
对应生成的SSA如下:
a1 = 1;
a2 = a1 + 2;
b1 = a2 * 3;
可以发现这里 a1, a2, b1 都是不同版本的变量,清晰标识了数据依赖关系,SSA最大的好处就是每个变量都有唯一来源,有利于后续转化或验证程序的行为。
只不过官方文档也提到,Jimple 是 Soot 的主要 IR,大多数分析都是在 Jimple 层面实现的,目前soot接受以下的输入:
- Java(字节码和源代码,最高支持 Java 7),包括其他可编译为 Java 字节码的语言,例如 Scala
- Android 字节码
- Jimple
- Jasmin,一种低级中间表示。
提供以下输出:
- Java 字节码
- Android 字节码
- Jimple
- Jasmin
soot支持这些功能:
- 调用图构建
- 指向分析
- 定义/使用链
- 模板驱动的过程内数据流分析
- 模板驱动的过程间数据流分析,结合 Heros(使用 IFDS/IDE)或加权下推系统
- 可以使用流、字段、上下文敏感的需求驱动指针分析 Boomerang 来解决别名问题
- 结合 FlowDroid 或 IDEal 进行污点分析
soot的简单使用
检测工具:
git clone https://github.com/Lucarun/soot-ifds-base.git待测项目:
git clone https://github.com/CAGeng/sast-testcase-11-17在idea中打开待测项目,运行主类后生成的classes就是soot的输入:

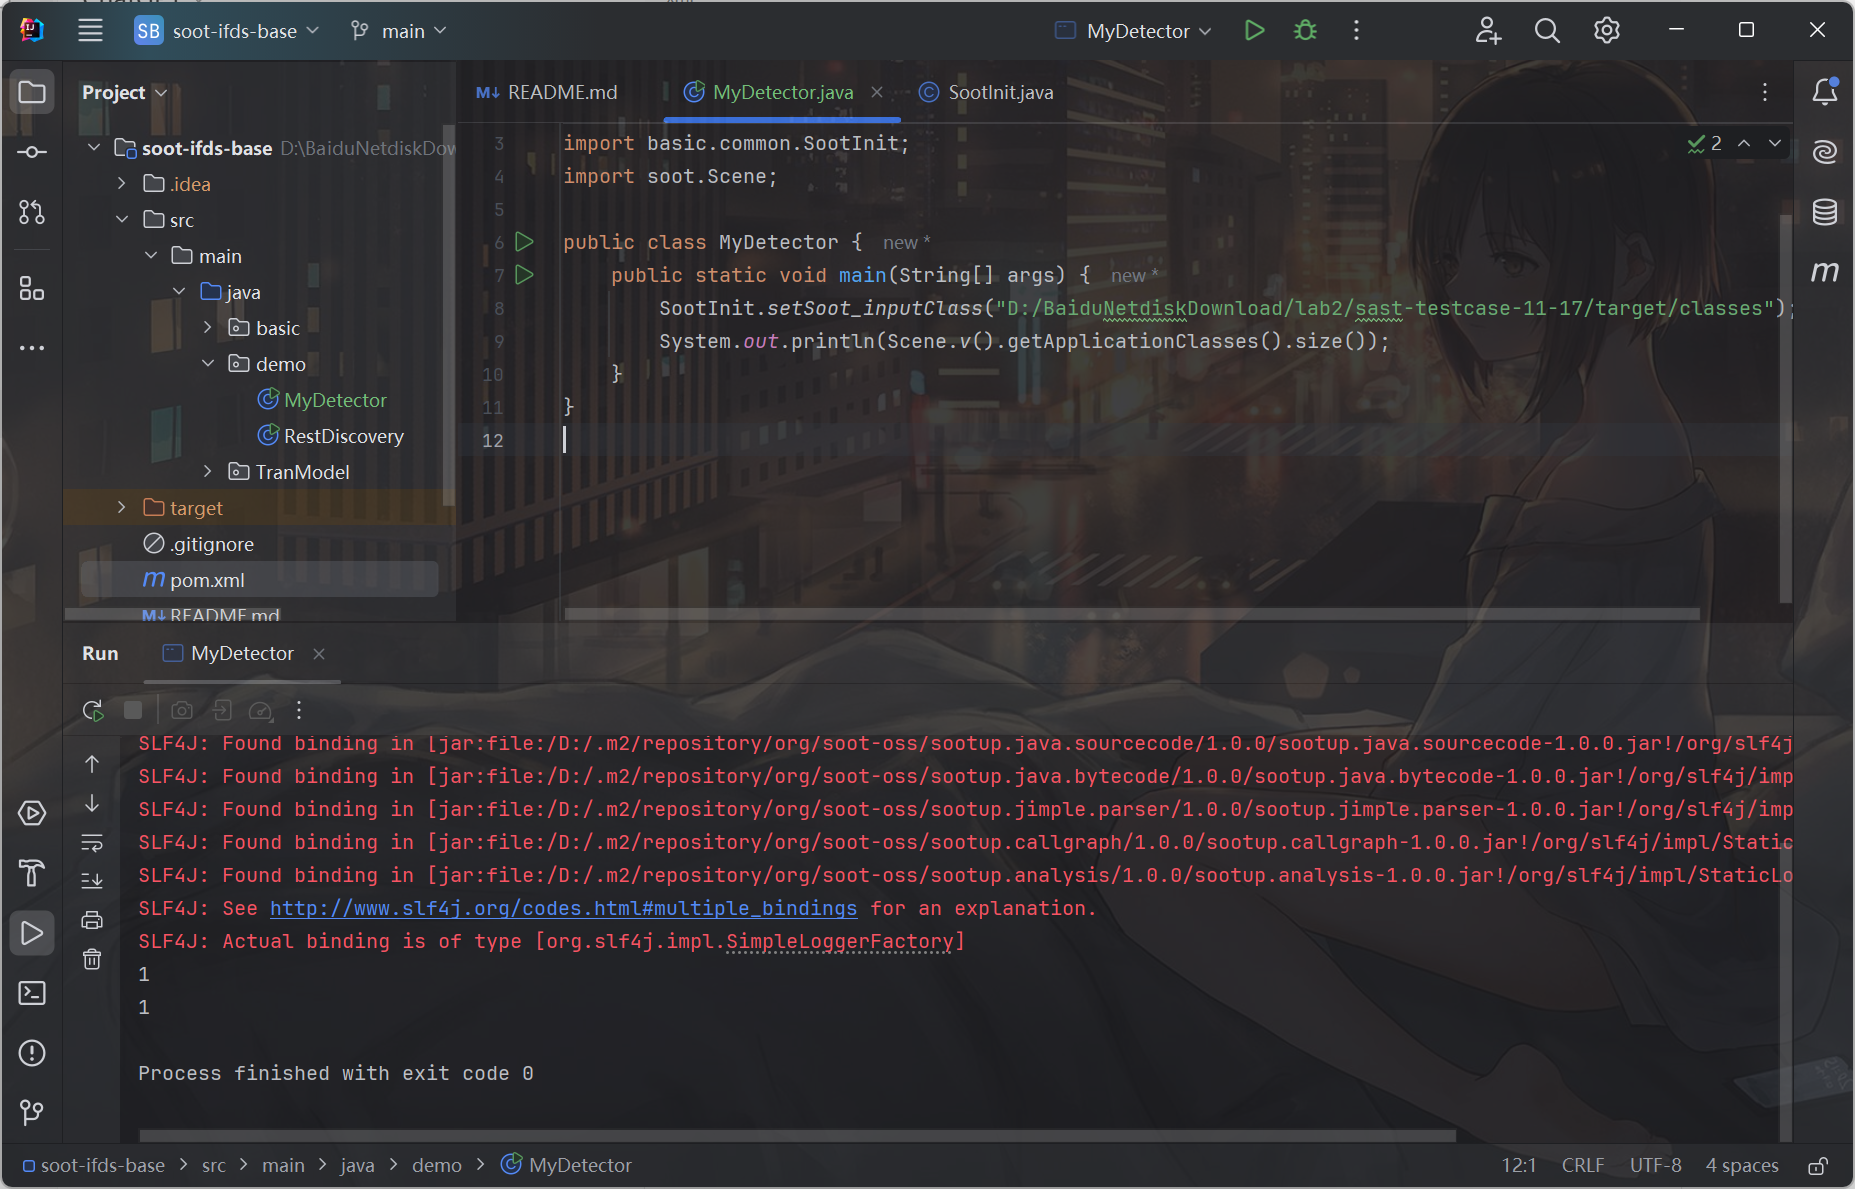
然后在检测工具里新建一个类打印已经加载到环境中的application class数量,soot用一个全局的Scene来维护加载到环境的待分析的类:
package demo;

import basic.common.SootInit;
import soot.Scene;

public class MyDetector {
    public static void main(String[] args) {
        SootInit.setSoot_inputClass("D:/BaiduNetdiskDownload/lab2/sast-testcase-11-17/target/classes");
        System.out.println(Scene.v().getApplicationClasses().size());
    }
}
遍历类和方法
soot中使用SootClass表示类,使用SootMethod表示方法:
package demo;

import basic.common.SootInit;
import soot.Scene;
import soot.SootClass;
import soot.SootMethod;

public class MyDetector {
    public static void main(String[] args) {
        SootInit.setSoot_inputClass("D:/BaiduNetdiskDownload/lab2/sast-testcase-11-17/target/classes");
        System.out.println(Scene.v().getApplicationClasses().size());

        for(SootClass sootClass : Scene.v().getApplicationClasses()) {
            System.out.println("类: " + sootClass);

            for(SootMethod sootMethod : sootClass.getMethods()) {
                System.out.println("    方法: " + sootMethod);
            }
        }
    }
}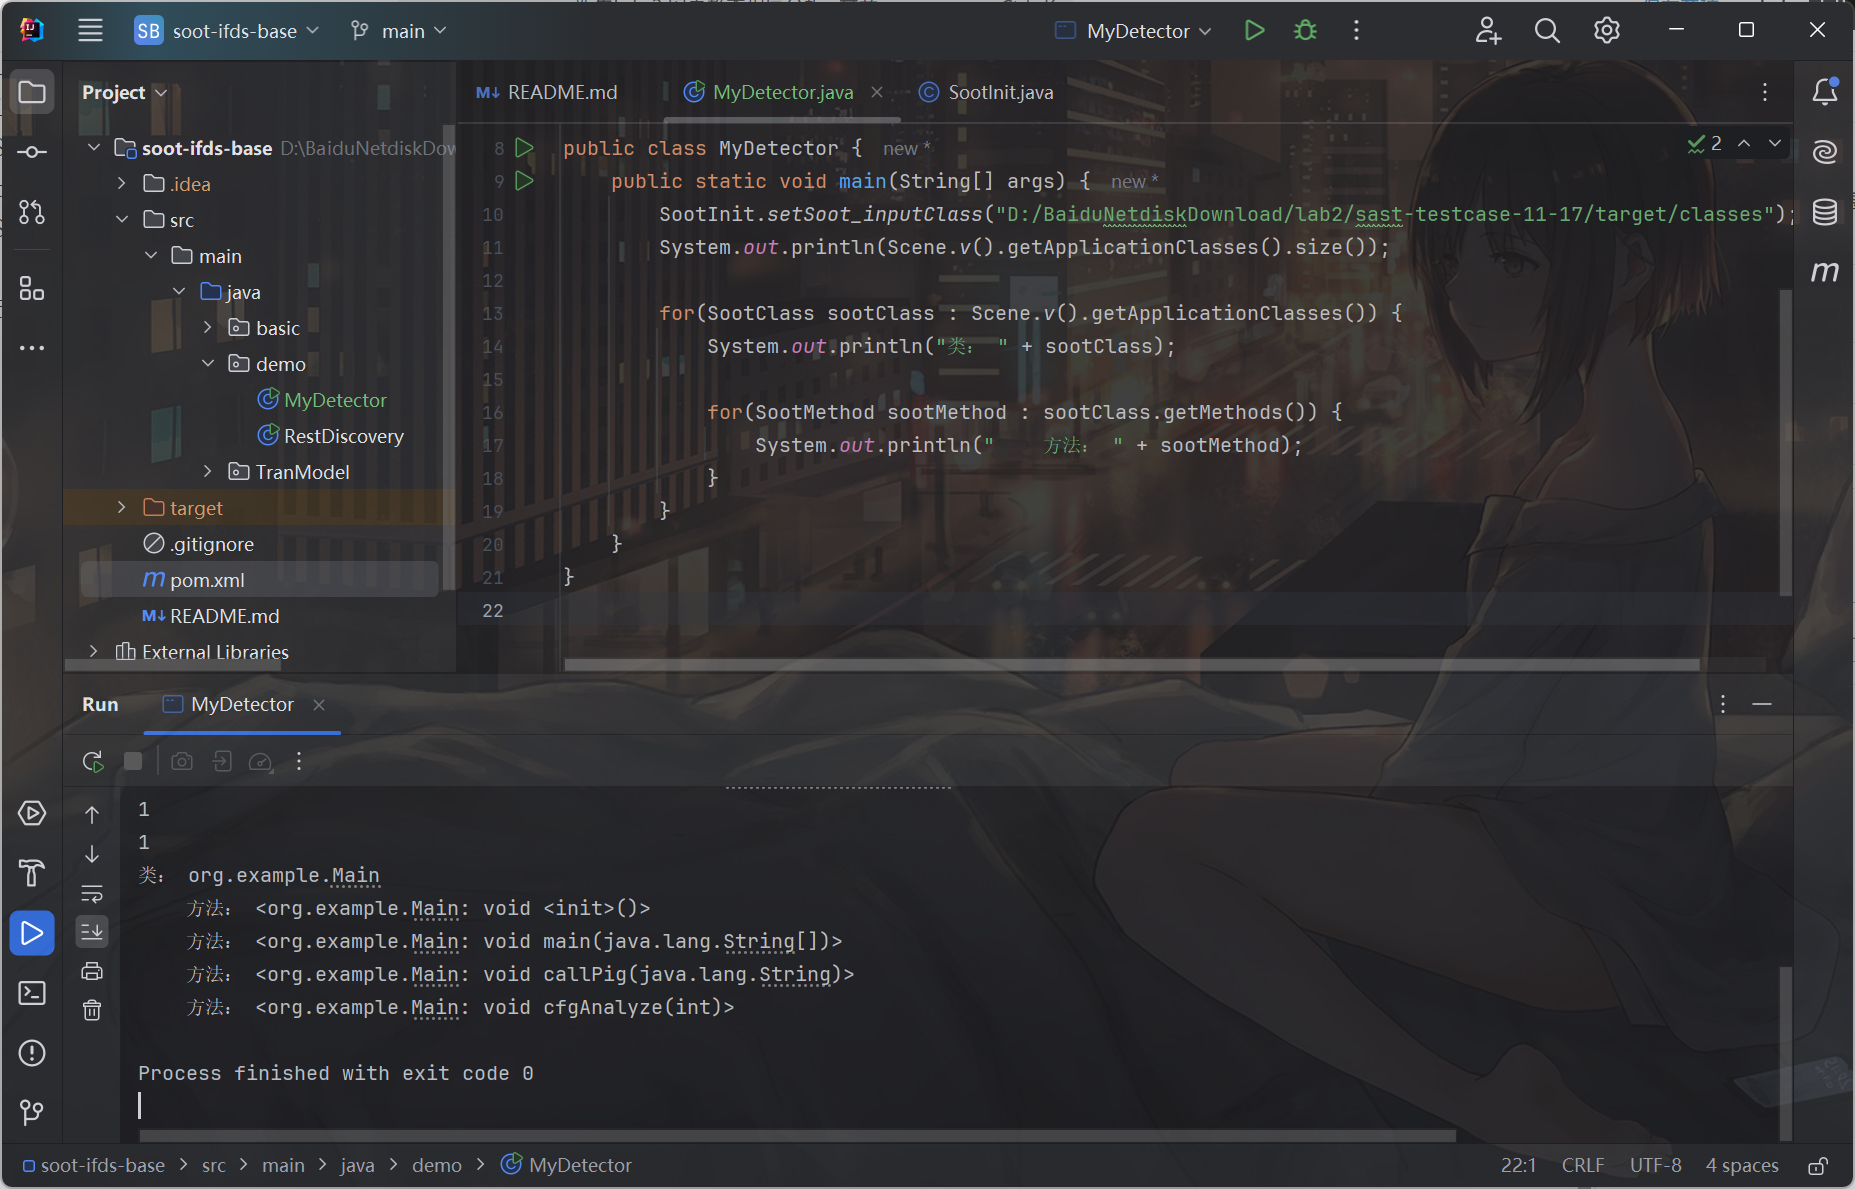
这里输出的方法是soot特有的method signature,包含方法名、参数等信息,<init>指的是java类默认的构造方法。这里我们将生成的method signature和代码里真实的main方法做一个对比,可以看到还是蛮形象的:

构建调用图
调用图指的是方法间的调用关系,每个节点是一个方法,方法A->方法B的连边表示方法A中调用了方法B。
在我们之前的代码里可以很明显的看到,在main方法中我们调用了callPig,这里自然就存在一个方法间的调用关系,这里我们查看一下他们的调用图:
package demo;

import basic.cg.CG;
import basic.common.SootInit;
import soot.Scene;
import soot.SootMethod;

import java.util.HashSet;

public class MyDetector {
    public static void main(String[] args) {
        SootInit.setSoot_inputClass("D:/BaiduNetdiskDownload/lab2/sast-testcase-11-17/target/classes");
        System.out.println(Scene.v().getApplicationClasses().size());

        SootMethod sootMethod = Scene.v().getMethod("<org.example.Main: void main(java.lang.String[])>");
        CG cg = new CG(sootMethod);
        for(SootMethod sootMethod1 : cg.getAllMethods()) {
            System.out.println("方法: " + sootMethod1);
            HashSet<SootMethod> calledMethods = cg.edgesOutOf(sootMethod1);
            for(SootMethod method : calledMethods) {
                System.out.println("调用了: " + method);
            }
        }
    }
}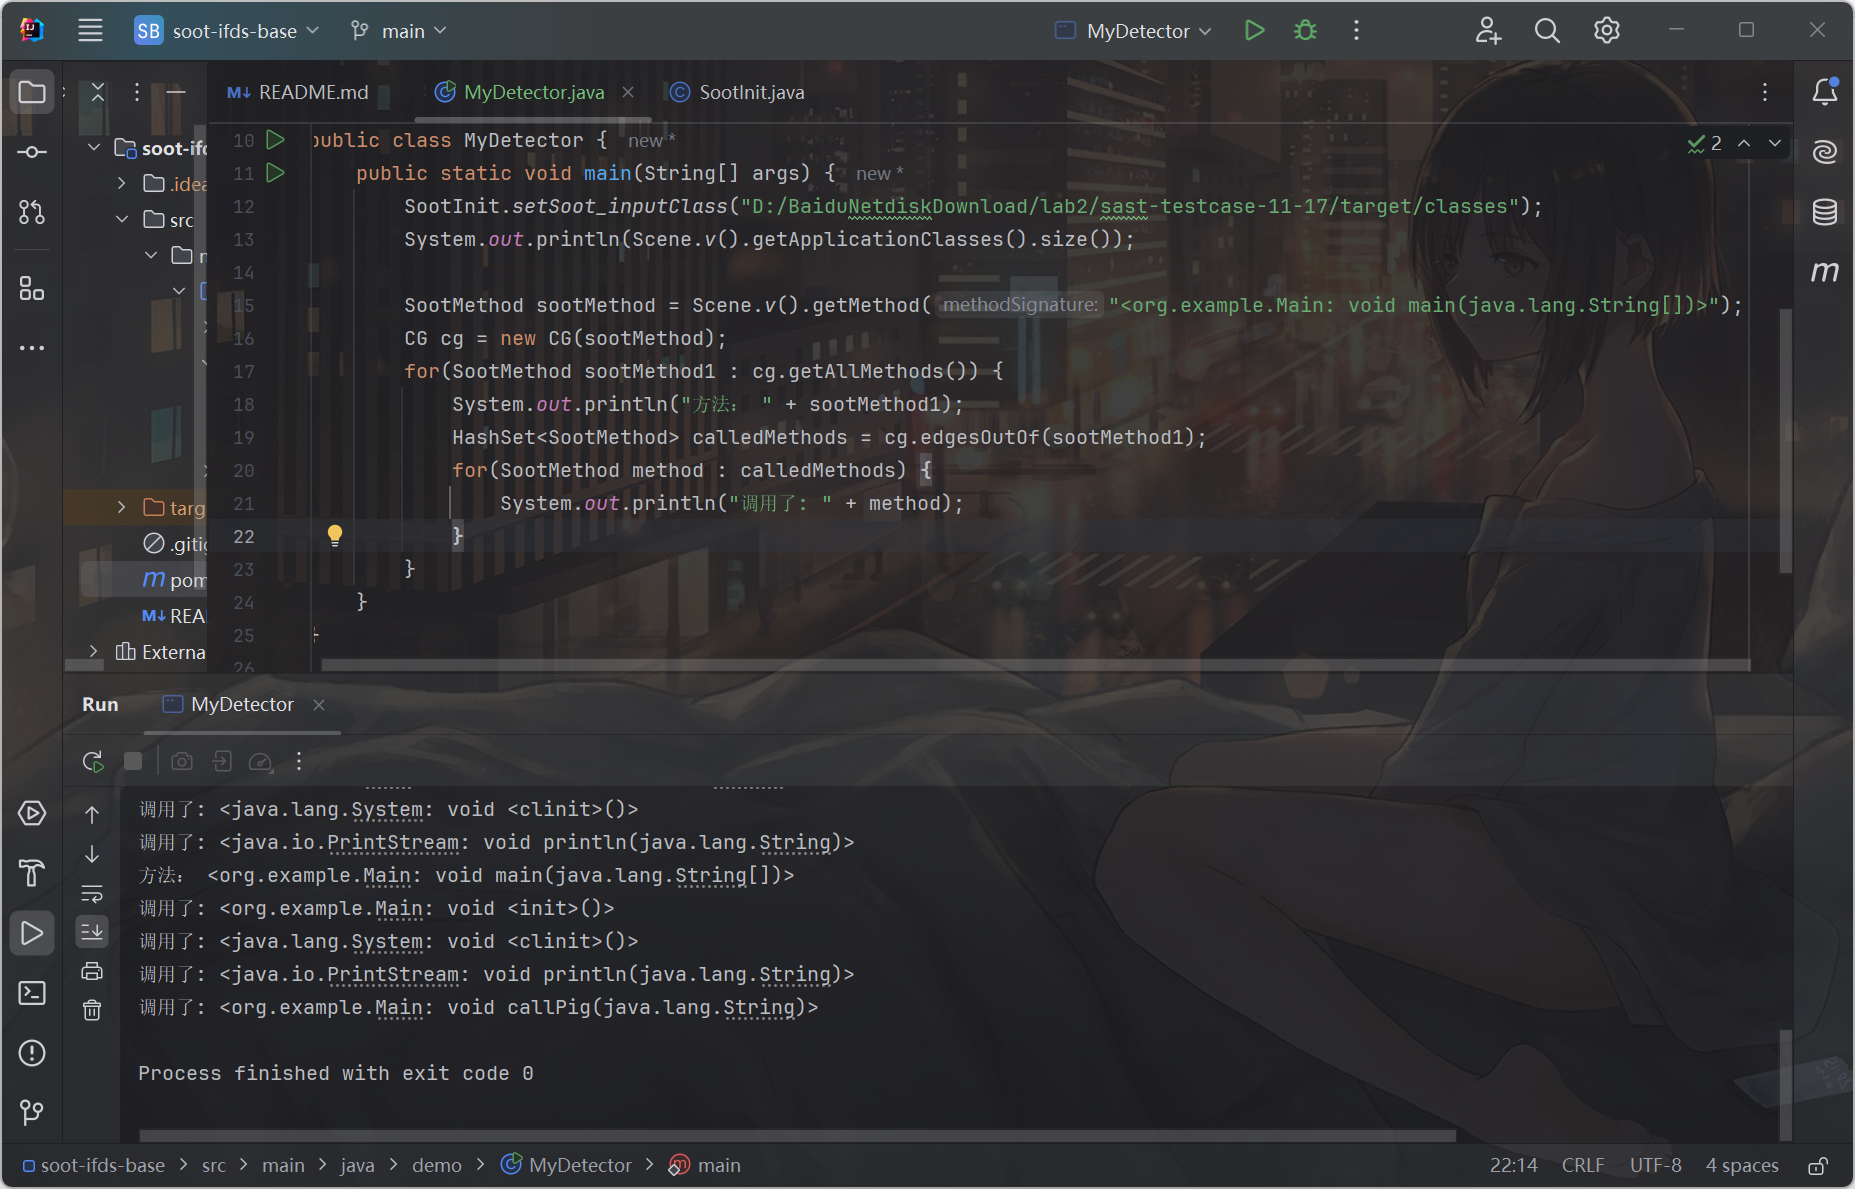
上面的代码中,CG cg = new CG(sootMethod)用于构建调用图,传入的sootMethod用于指定以哪个方法为入口构建调用树。而cg.edgesOutOf(sootMethod1)获取了所有的出边节点,也就是被调用的方法。在图里的执行结果里我们可以很明显的看出来,main方法首先调用了println,然后调用了callPig
控制流分析
控制流是程序中的执行流,在soot中每个节点是一个Unit,一般而言与Java语句一一对应。
这里我们来看看这个分支语句的情况:

package demo;

import basic.cfg.CFG;
import basic.cfg.Node;
import basic.common.SootInit;
import soot.Scene;
import soot.SootMethod;


public class MyDetector {
    public static void main(String[] args) {
        SootInit.setSoot_inputClass("D:/BaiduNetdiskDownload/lab2/sast-testcase-11-17/target/classes");
        System.out.println(Scene.v().getApplicationClasses().size());

        SootMethod sootMethod = Scene.v().getMethod("<org.example.Main: void cfgAnalyze(int)>");

        CFG cfg = new CFG(sootMethod, true);
        cfg.buildCFG();

        for(Node node : cfg.allNodes.values()) {
            System.out.println(node);
        }
    }
}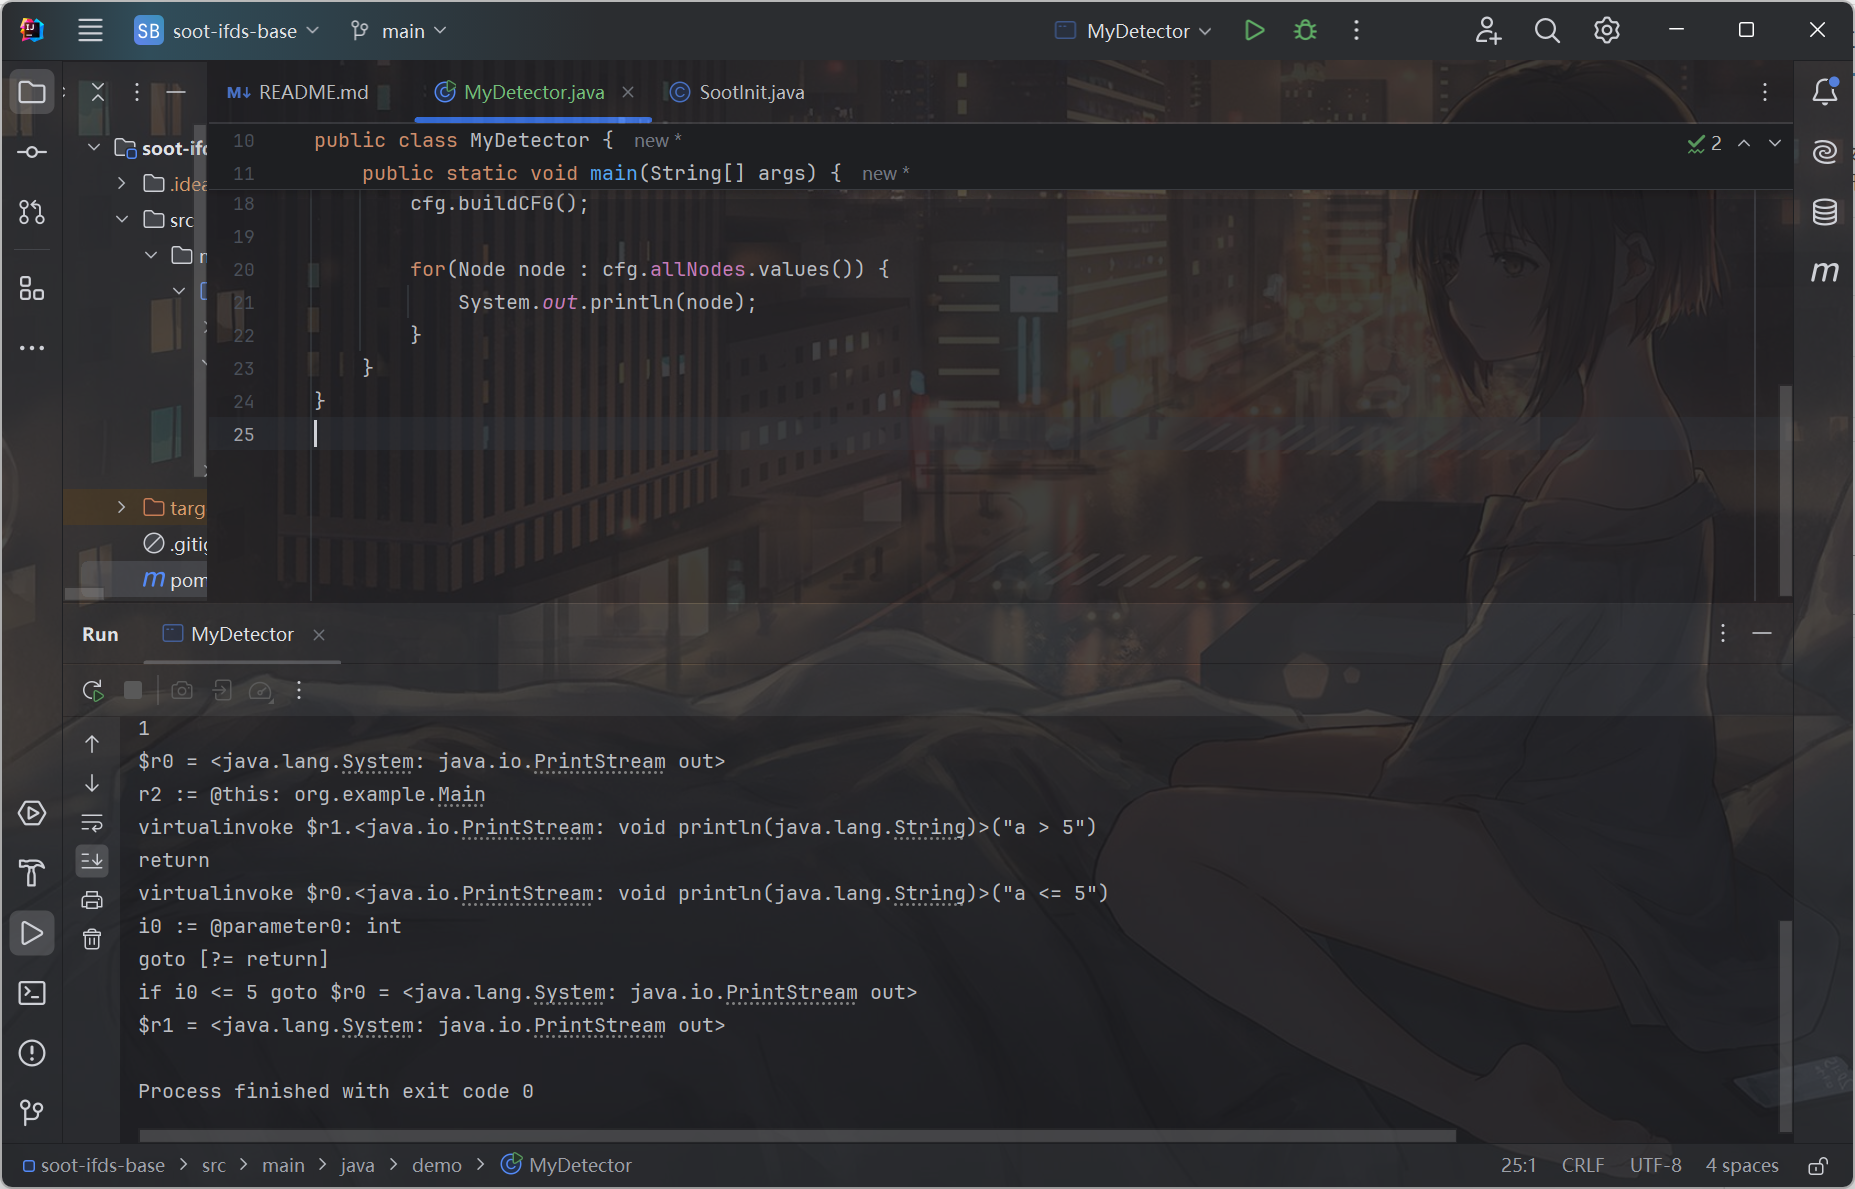
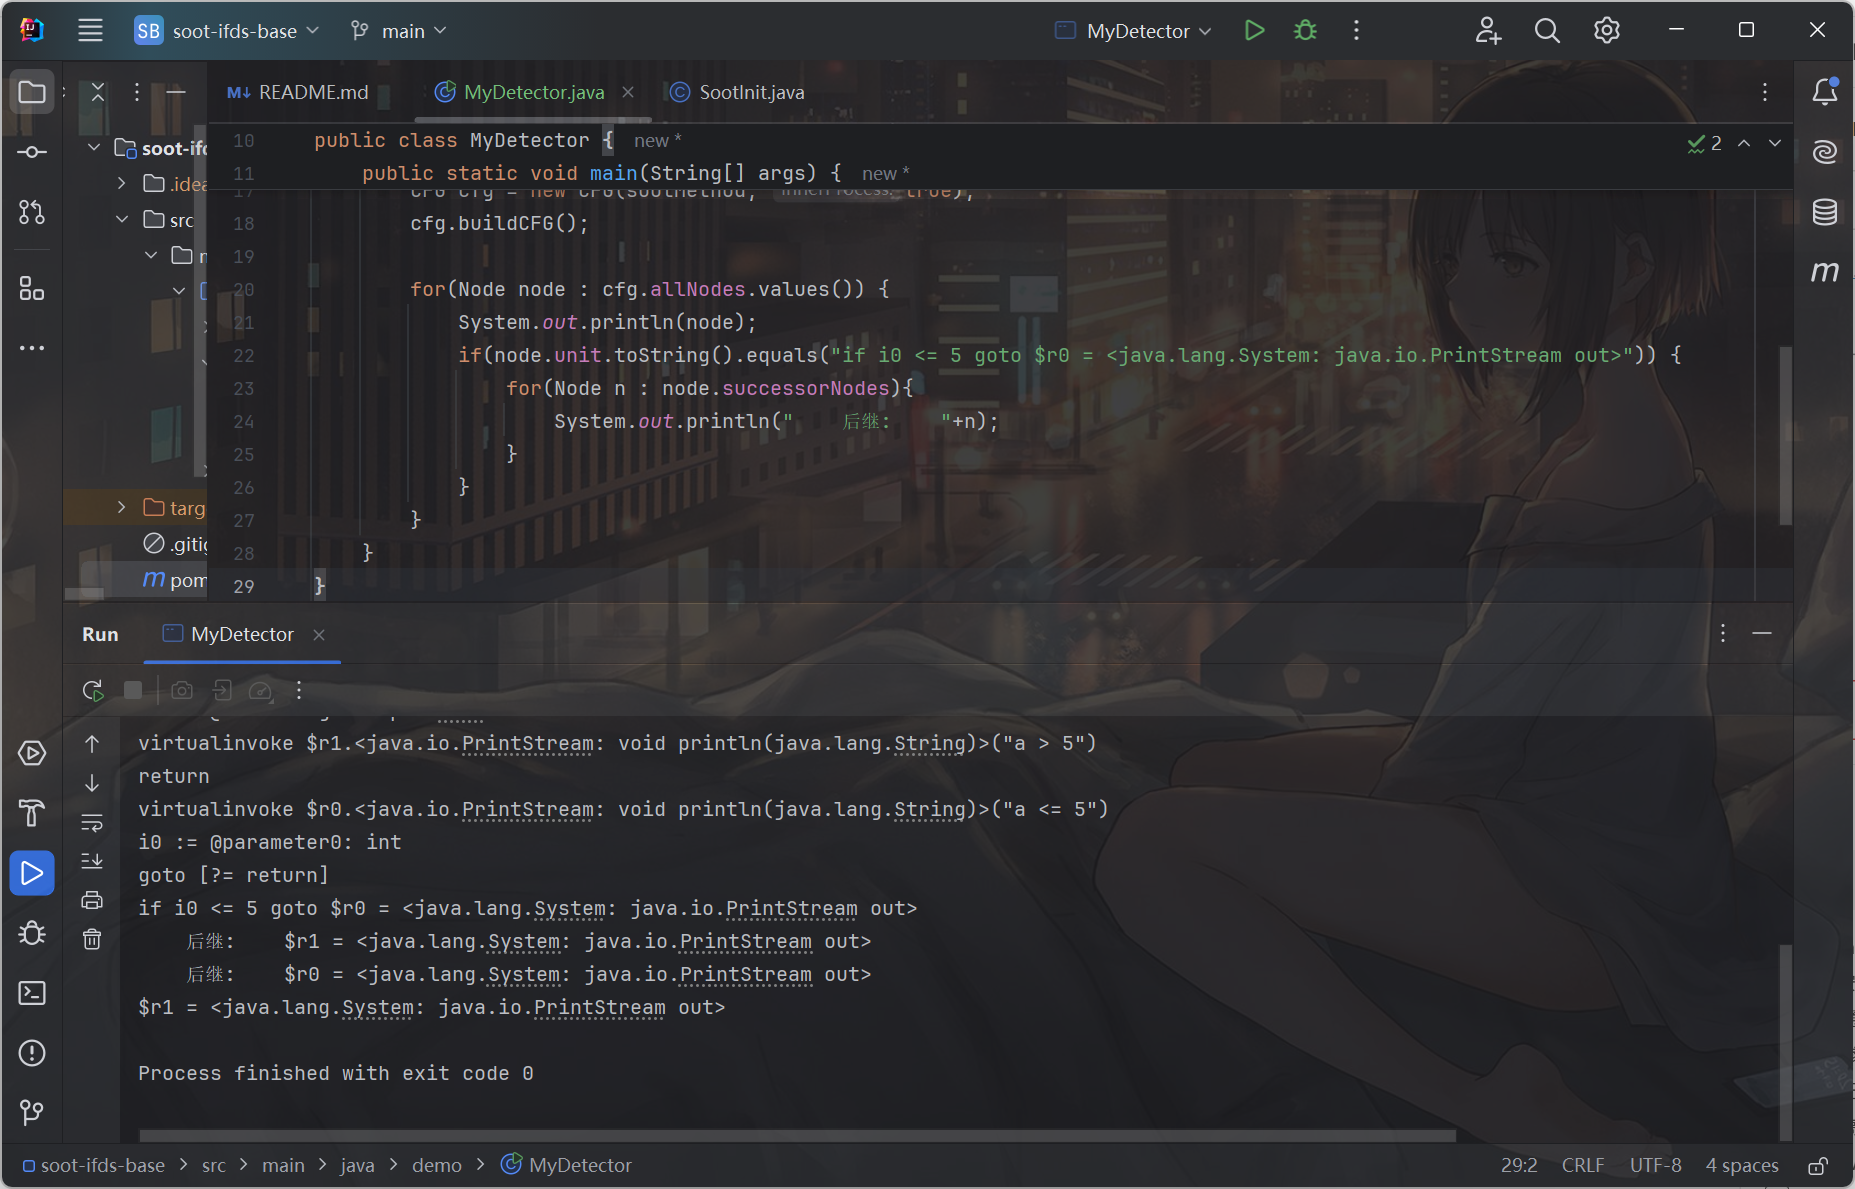
上面的输出是乱序的Jimple IR,但我们可以从node的属性中获取前后驱关系,比如 node.successorNodes,把上面的遍历改成下面这个:
for(Node node : cfg.allNodes.values()) {
            System.out.println(node);
            if(node.unit.toString().equals("if i0 <= 5 goto $r0 = <java.lang.System: java.io.PrintStream out>")) {
                for(Node n : node.successorNodes){
                    System.out.println("    后继:    "+n);
                }
            }
        }
控制流分析(2)
在上面的遍历中,我们的输出是乱序的,也就是说并不是流敏感的,不包含节点间的前后关系。并且在代码 CFG cfg = new CFG(sootMethod, true)这里由于我们指定了第二个参数为true(innerProcess为true),因此这里实际上建立的是过程内控制流图,只包含一个方法,而不包含方法调用。
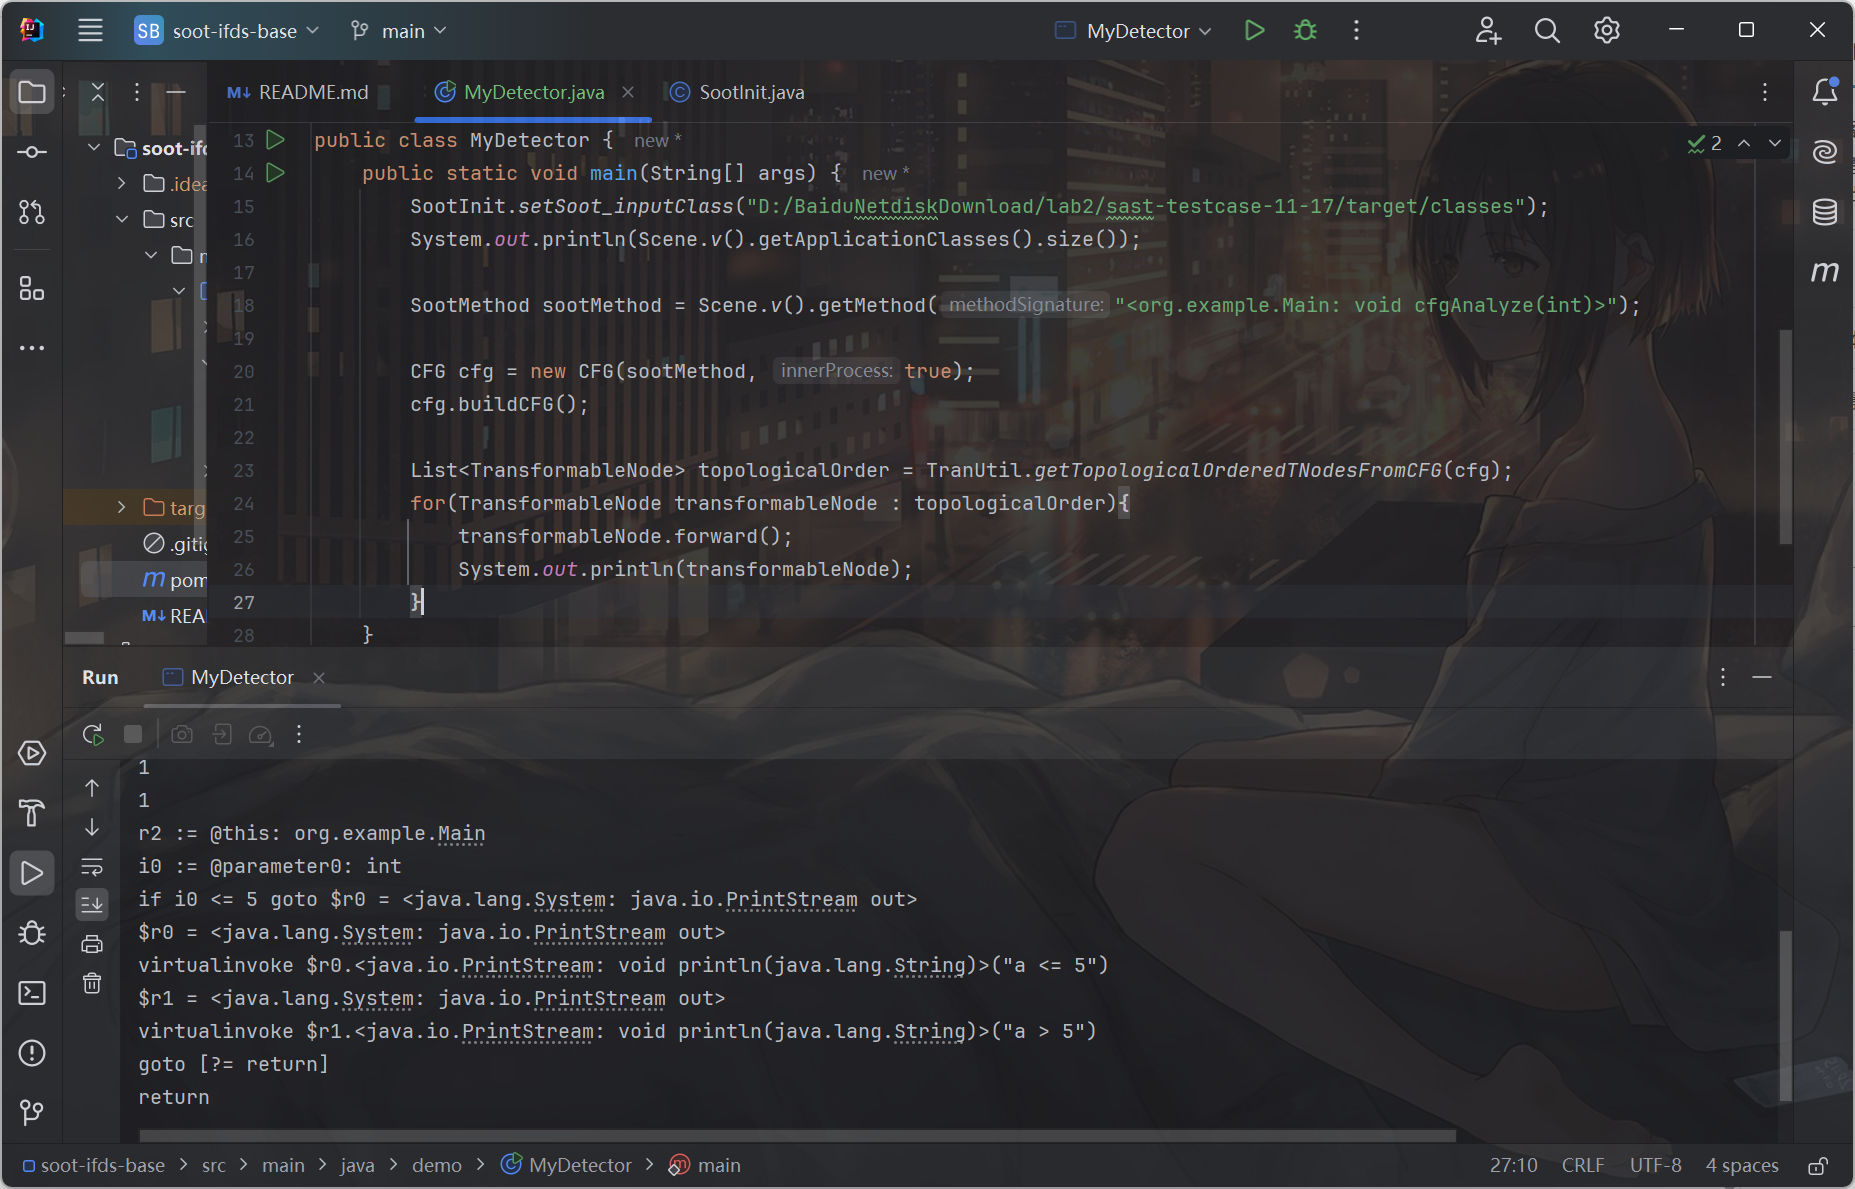
这里我们首先来解决第一个问题,把代码改成这样:
package demo;

import TranModel.TranUtil;
import TranModel.TransformableNode;
import basic.cfg.CFG;
import basic.common.SootInit;
import soot.Scene;
import soot.SootMethod;

import java.util.List;


public class MyDetector {
    public static void main(String[] args) {
        SootInit.setSoot_inputClass("D:/BaiduNetdiskDownload/lab2/sast-testcase-11-17/target/classes");
        System.out.println(Scene.v().getApplicationClasses().size());

        SootMethod sootMethod = Scene.v().getMethod("<org.example.Main: void cfgAnalyze(int)>");

        CFG cfg = new CFG(sootMethod, true);
        cfg.buildCFG();

        List<TransformableNode> topologicalOrder = TranUtil.getTopologicalOrderedTNodesFromCFG(cfg);
        for(TransformableNode transformableNode : topologicalOrder){
            transformableNode.forward();
            System.out.println(transformableNode);
        }
    }
}
这里我们就按拓扑排序的方式遍历了节点,存在了潜在的前后关系:
控制流分析(3)过程间控制流分析
在之前的输出里我们可以看到,比如main方法调用了callPig方法,那么会输出:
virtualinvoke $r1.<org.example.Main: void callPig(java.lang.String)>("pig")所谓的过程间分析,就是需要我们再深入一步,再深入callPig方法本身的调用结果
package demo;

import TranModel.TranUtil;
import TranModel.TransformableNode;
import basic.cfg.CFG;
import basic.cg.CG;
import basic.common.SootInit;
import soot.Scene;
import soot.SootClass;
import soot.SootMethod;

import java.util.List;


public class MyDetector {
    public static void main(String[] args) {
        SootInit.setSoot_inputClass("D:/BaiduNetdiskDownload/lab2/sast-testcase-11-17/target/classes");
        System.out.println(Scene.v().getApplicationClasses().size());

        for(SootClass sootClass : Scene.v().getApplicationClasses()) {
            System.out.println("类: " + sootClass);

            for(SootMethod sootMethod : sootClass.getMethods()) {
                System.out.println("    方法: " + sootMethod);
            }
        }

        SootMethod sootMethod = Scene.v().getMethod("<org.example.Main: void main(java.lang.String[])>");
        CG cg = new CG(sootMethod);
        TranUtil.cg = cg;
        MyDetector myDetector = new MyDetector();
        myDetector.detectMethodRecurse(sootMethod);
    }

    public void detectMethodRecurse(SootMethod sootMethod) {

        System.out.println("现在分析方法: " + sootMethod);

        CFG cfg = new CFG(sootMethod, true);
        cfg.buildCFG();

        List<TransformableNode> topologicalOrder = TranUtil.getTopologicalOrderedTNodesFromCFG(cfg);
        for(TransformableNode transformableNode : topologicalOrder){
            transformableNode.forward();
//            System.out.println(transformableNode);
            if(transformableNode.containsInvoke()) {
                for(SootMethod invokedMethod : transformableNode.invokeMethods()) {
                    detectMethodRecurse(invokedMethod);
                }
            }
        }
    }
}
这里我们是实现了一个丐版的过程间控制流分析,主要通过递归来实现被调用者的方法。
活跃变量分析
对于变量x和程序点p,如果在程序流图中沿着从p开始的某条路径会引用变量x在p点的值,则称变量x在点p是活跃(live)的,否则称变量x在点p是不活跃(dead)的,也就是说,它的值可能在之后被使用,而在此之前没有被重新赋值
主要作用有两个:
- 删除无用赋值:比如在某个点赋值之后发现后面其实用不到,那么其实就可以删除这个赋值
- 寄存器分配:如果需要分配寄存器,可以优先分配这些不活跃变量占据的寄存器。
在这里有几个符号:
- def[B]: 基本块B中定义的变量集合。即在B中被赋值(定义)的变量。
- use[B]: 基本块B中使用的变量集合。即在B中被使用但未先被定义的变量。
- 示例:
y = x + 3(且x未在B中先定义) 会导致x ∈ use[B]
- 示例:
- IN[B]:在进入
B时哪些变量是活跃的(可能在未来被使用)。 - OUT[B]:在离开
B时哪些变量是活跃的(由后继块的IN决定)
活跃变量分析是逆向数据流分析,其方程为:
OUT[B] = ∪ IN[S] (对于所有B的后继S)
IN[B] = use[B] ∪ (OUT[B] - def[B])- 一个变量在基本块的出口活跃,如果它在某个后继基本块的入口活跃
- 一个变量在基本块
B的入口是活跃的,如果它在B中被使用(即use[B]),或者它在B的后继块中活跃而在B中没有被定义(覆盖)。use[B]:在B中被使用(读取)但未先定义的变量(即它们的值来自B之前的计算)。OUT[B] - def[B]:如果一个变量在B的出口处是活跃的(即在B的后继块中被使用),但在B内部没有被重新定义,那么它的值 必须来自B的入口(即它在B的入口处也是活跃的),如果来自于 B 内部的赋值,其实我们就不能确定它一定在入口处活跃了
对于下面这个例子:
B1:
1: x = 10
2: y = 20
3: if x > y goto B3

B2:
4: z = x + y
5: w = z * 2
6: goto B4

B3:
7: z = x - y
8: w = z / 2

B4:
9: print(w)
其结果如下:
| 基本块 | def[B] | use[B] |
|---|---|---|
B1 | {x, y} | {} |
B2 | {z, w} | {x, y} |
B3 | {z, w} | {x, y} |
B4 | {} | {w} |
初始化时,所有 IN[B] = {},OUT[B] = {},由于是逆向分析,我们从 B4 开始,然后 B3 和 B2,最后 B1:
B4的分析use[B4] = {w},def[B4] = {}OUT[B4] = {}(没有后继)IN[B4] = use[B4] ∪ (OUT[B4] \ def[B4]) = {w} ∪ ({} \ {}) = {w}
B3的分析use[B3] = {x, y},def[B3] = {z, w}OUT[B3] = IN[B4] = {w}(B3的后继是B4)IN[B3] = {x, y} ∪ ({w} \ {z, w}) = {x, y} ∪ {} = {x, y}
B2的分析use[B2] = {x, y},def[B2] = {z, w}OUT[B2] = IN[B4] = {w}(B2 的后继只有 B4 ,直接跳转过去了)IN[B2] = {x, y} ∪ ({w} \ {z, w}) = {x, y} ∪ {} = {x, y}
B1的分析use[B1] = {},def[B1] = {x, y}OUT[B1] = IN[B2] ∪ IN[B3] = {x, y} ∪ {x, y} = {x, y}(B1 的后继是 B2和B3,一个来自条件跳转,一个来自直接相连的边)IN[B1] = {} ∪ ({x, y} \ {x, y}) = {} ∪ {} = {}
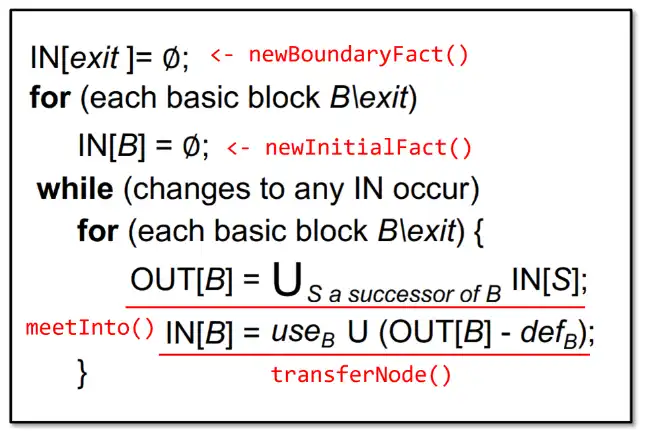
对应的算法如下:
参考
https://vwptc6ky5dr.feishu.cn/docx/DlxxdshmpoRhEZxtF0sctr89nuc
Lab
环境配置
这里我直接上maven了,pom.xml如下:
<?xml version="1.0" encoding="UTF-8"?>
<project xmlns="http://maven.apache.org/POM/4.0.0"
         xmlns:xsi="http://www.w3.org/2001/XMLSchema-instance"
         xsi:schemaLocation="http://maven.apache.org/POM/4.0.0 http://maven.apache.org/xsd/maven-4.0.0.xsd">
    <modelVersion>4.0.0</modelVersion>

    <groupId>com.itheima</groupId>
    <artifactId>soot_lab</artifactId>
    <version>1.0-SNAPSHOT</version>

    <properties>
        <maven.compiler.source>8</maven.compiler.source>
        <maven.compiler.target>8</maven.compiler.target>
        <project.build.sourceEncoding>UTF-8</project.build.sourceEncoding>
    </properties>

    <dependencies>
        <dependency>
            <groupId>org.soot-oss</groupId>
            <artifactId>sootup.core</artifactId>
            <version>1.0.0</version>
        </dependency>
        <dependency>
            <groupId>org.soot-oss</groupId>
            <artifactId>sootup.java.core</artifactId>
            <version>1.0.0</version>
        </dependency>
        <dependency>
            <groupId>org.soot-oss</groupId>
            <artifactId>sootup.java.sourcecode</artifactId>
            <version>1.0.0</version>
        </dependency>
        <dependency>
            <groupId>org.soot-oss</groupId>
            <artifactId>sootup.java.bytecode</artifactId>
            <version>1.0.0</version>
        </dependency>
        <dependency>
            <groupId>org.soot-oss</groupId>
            <artifactId>sootup.jimple.parser</artifactId>
            <version>1.0.0</version>
        </dependency>
        <dependency>
            <groupId>org.soot-oss</groupId>
            <artifactId>sootup.callgraph</artifactId>
            <version>1.0.0</version>
        </dependency>
        <dependency>
            <groupId>org.soot-oss</groupId>
            <artifactId>sootup.analysis</artifactId>
            <version>1.0.0</version>
        </dependency>
        <dependency>
            <groupId>org.soot-oss</groupId>
            <artifactId>soot</artifactId>
            <version>4.3.0</version>
        </dependency>
        <dependency>
            <groupId>org.openjfx</groupId>
            <artifactId>javafx</artifactId>
            <version>19.0.2.1</version>
            <type>pom</type>
        </dependency>
        <dependency>
            <groupId>org.openjfx</groupId>
            <artifactId>javafx-controls</artifactId>
            <version>16</version>
        </dependency>
        <dependency>
            <groupId>com.fasterxml.jackson.core</groupId>
            <artifactId>jackson-databind</artifactId>
            <version>2.15.1</version>
        </dependency>
    </dependencies>
    <build>
        <plugins>
            <plugin>
                <groupId>org.apache.maven.plugins</groupId>
                <artifactId>maven-compiler-plugin</artifactId>
                <configuration>
                    <source>8</source>
                    <target>8</target>
                </configuration>
            </plugin>
        </plugins>
    </build>

</project>
Task 1.活跃变量分析
任务要求:
- 利用soot中的BackwardFlowAnalysis类完成活跃变量分析,需通过实现自已的FlowAnalysis类并继承BackwardFlowAnalysis类来扩展数据流分析,以实现活跃变量分析功能。
- 解析lab2.class完成活跃变量分析,打印出每句语句前后的活跃变量
首先用idea反编译一下我们的目标lab2.class:
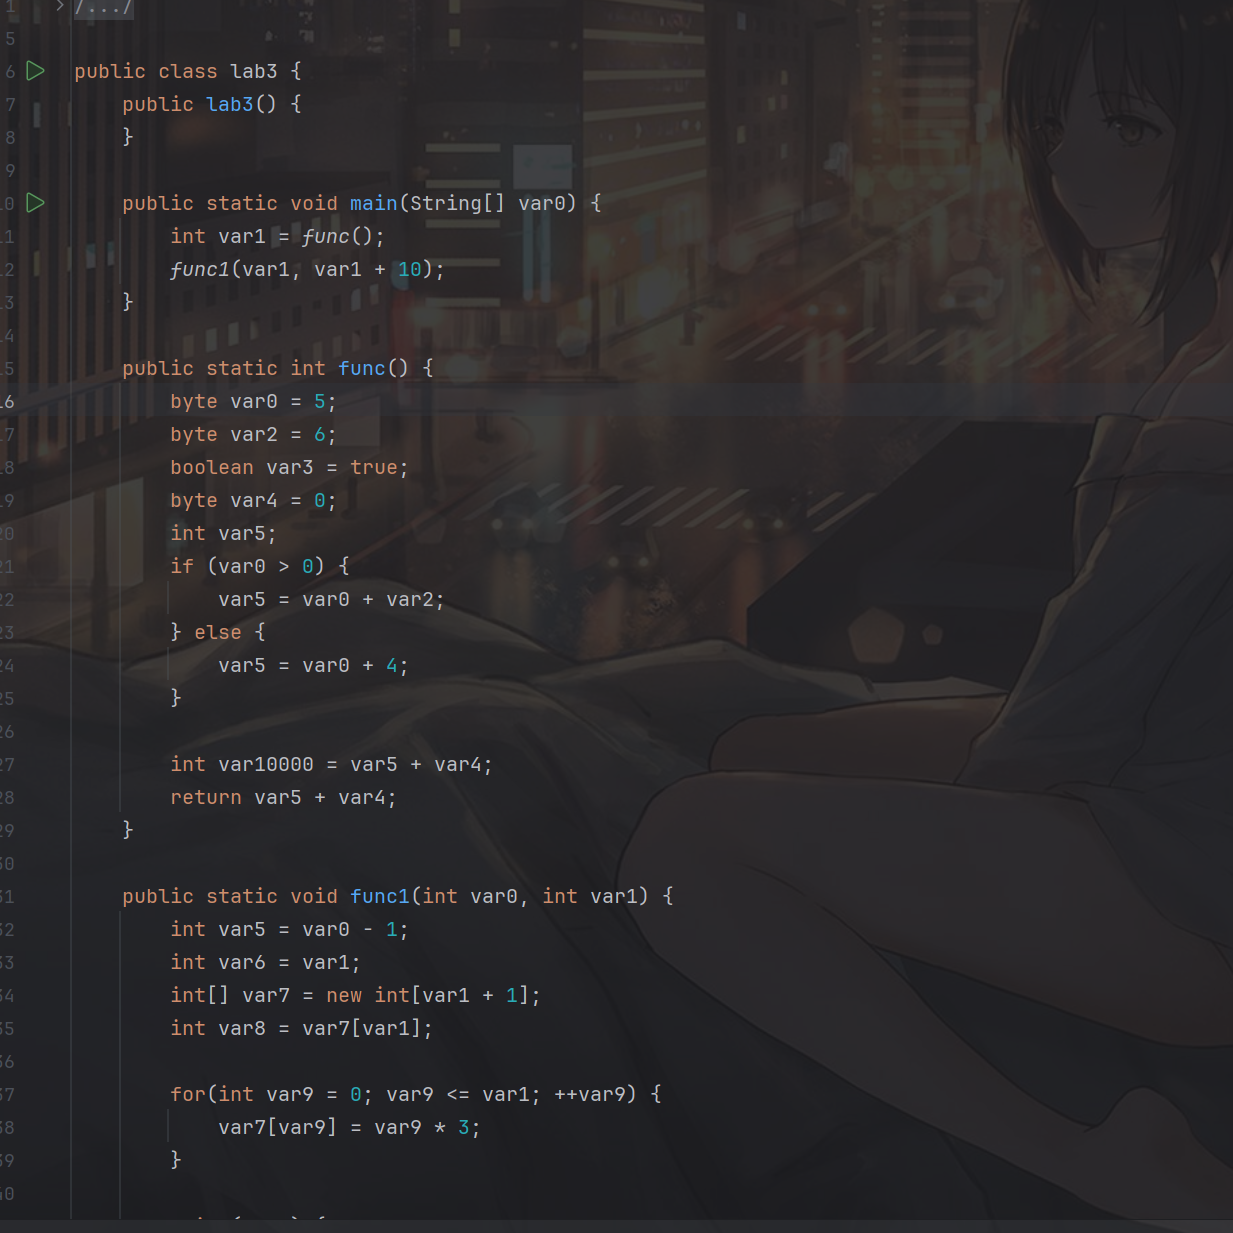
不知道为什么lab_2.class里塞了个class lab3,这里首先先class名改成lab3.class。然后看一看BackwardFlowAnalysis,这里面其实没什么东西:
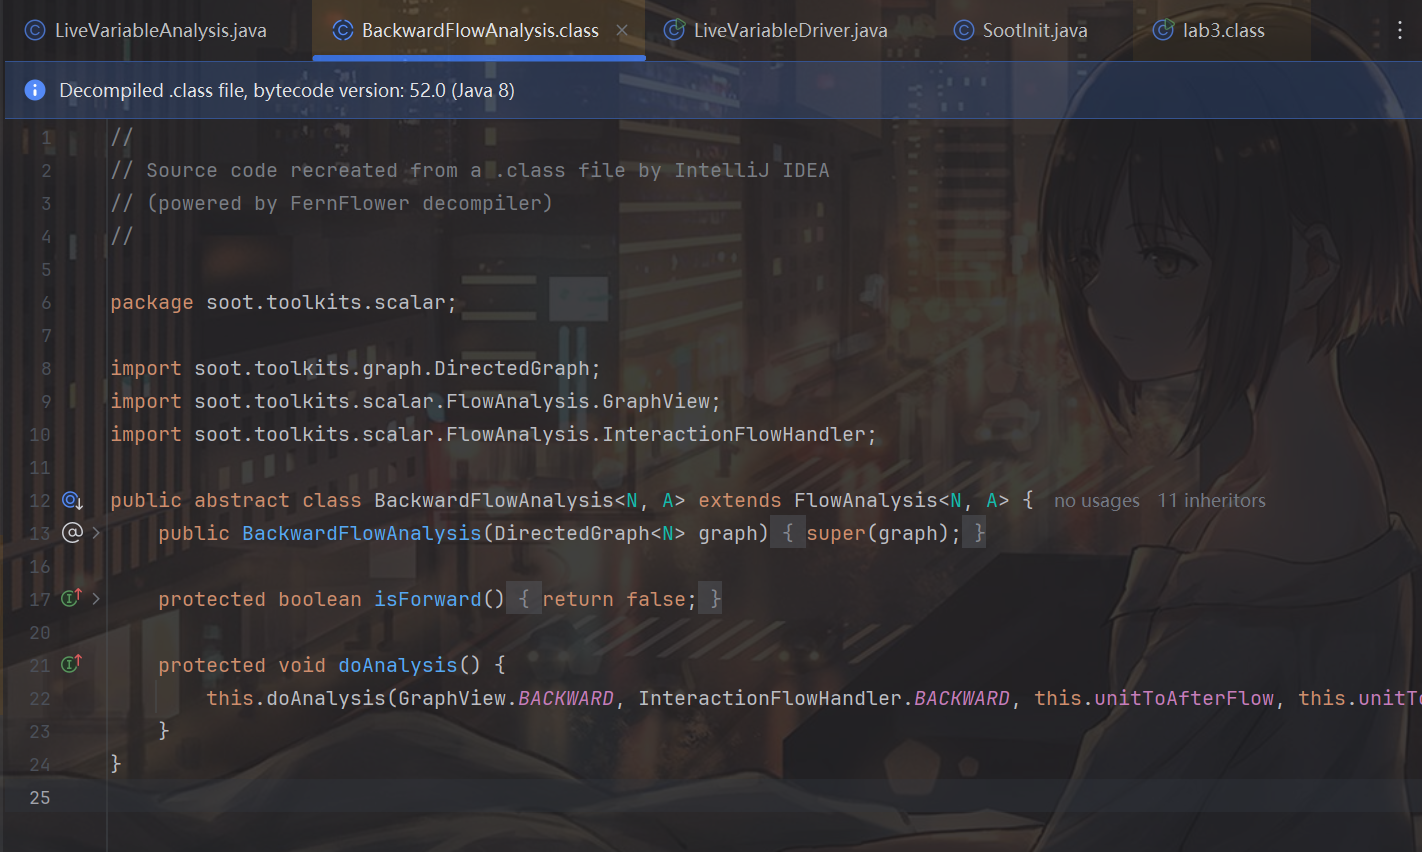
实现活跃变量分析的本质其实是实现这个转移方程:
OUT[B] = ∪ IN[S]
IN[B] = use[B] ∪ (OUT[B] - def[B])
对于use和def,其实在soot的unit里有现成的实现:

所以这里我们只需要返回一下即可:
private Set<String> getDef(Unit unit) {
        Set<String> def = new HashSet<>();
        for (ValueBox vb : unit.getDefBoxes()) {
            if (vb.getValue() instanceof Local) {
                def.add(vb.getValue().toString());
            }
        }
        return def;
    }

private Set<String> getUse(Unit unit) {
        Set<String> use = new HashSet<>();
        for (ValueBox vb : unit.getUseBoxes()) {
            if (vb.getValue() instanceof Local) {
                use.add(vb.getValue().toString());
            }
        }
        return use;
    }
在 Soot 的 BackwardFlowAnalysis 中,当当前节点有多个后继(succ),框架会依次把所有后继的 IN 集合合并,这里我们主要用于实现公式OUT[B] = ∪ IN[S]
protected void merge(Set<String> in1, Set<String> in2, Set<String> out) {
        out.clear();
        out.addAll(in1);
        out.addAll(in2);
}接着需要实现IN = (OUT - DEF) ∪ USE,代码如下,也就是获取out,先减去def,再并上use:
protected void flowThrough(Set<String> in, Unit unit, Set<String> out) {
        Set<String> inSet = new HashSet<>(out);

        // 获取def和use
        Set<String> def = getDef(unit);
        Set<String> use = getUse(unit);

        // IN = (OUT - DEF) ∪ USE
        inSet.removeAll(def);
        inSet.addAll(use);

        in.clear();
        in.addAll(inSet);

        // 打印当前语句的活跃变量
        System.out.println("Statement: " + unit);
        System.out.println("    IN : " + in);
        System.out.println("    OUT: " + out);
    }
完整的LiveVariableAnalysis如下:
package livevar;
import soot.*;
import soot.toolkits.graph.DirectedGraph;
import soot.toolkits.scalar.BackwardFlowAnalysis;
import java.util.HashSet;
import java.util.Set;
public class LiveVariableAnalysis extends BackwardFlowAnalysis<Unit, Set<String>> {
public LiveVariableAnalysis(DirectedGraph<Unit> graph) {
super(graph);
doAnalysis();
}
@Override
protected void flowThrough(Set<String> in, Unit unit, Set<String> out) {
Set<String> inSet = new HashSet<>(out);
// 获取def和use
Set<String> def = getDef(unit);
Set<String> use = getUse(unit);
// IN = (OUT - DEF) ∪ USE
inSet.removeAll(def);
inSet.addAll(use);
in.clear();
in.addAll(inSet);
// 打印当前语句的活跃变量
System.out.println("Statement: " + unit);
System.out.println(" IN : " + in);
System.out.println(" OUT: " + out);
}
@Override
protected Set<String> newInitialFlow() {
return new HashSet<>();
}
@Override
protected Set<String> entryInitialFlow() {
return new HashSet<>();
}
@Override
protected void merge(Set<String> in1, Set<String> in2, Set<String> out) {
out.clear();
out.addAll(in1);
out.addAll(in2);
}
@Override
protected void copy(Set<String> source, Set<String> dest) {
dest.clear();
dest.addAll(source);
}
private Set<String> getDef(Unit unit) {
Set<String> def = new HashSet<>();
for (ValueBox vb : unit.getDefBoxes()) {
if (vb.getValue() instanceof Local) {
def.add(vb.getValue().toString());
}
}
return def;
}
private Set<String> getUse(Unit unit) {
Set<String> use = new HashSet<>();
for (ValueBox vb : unit.getUseBoxes()) {
if (vb.getValue() instanceof Local) {
use.add(vb.getValue().toString());
}
}
return use;
}
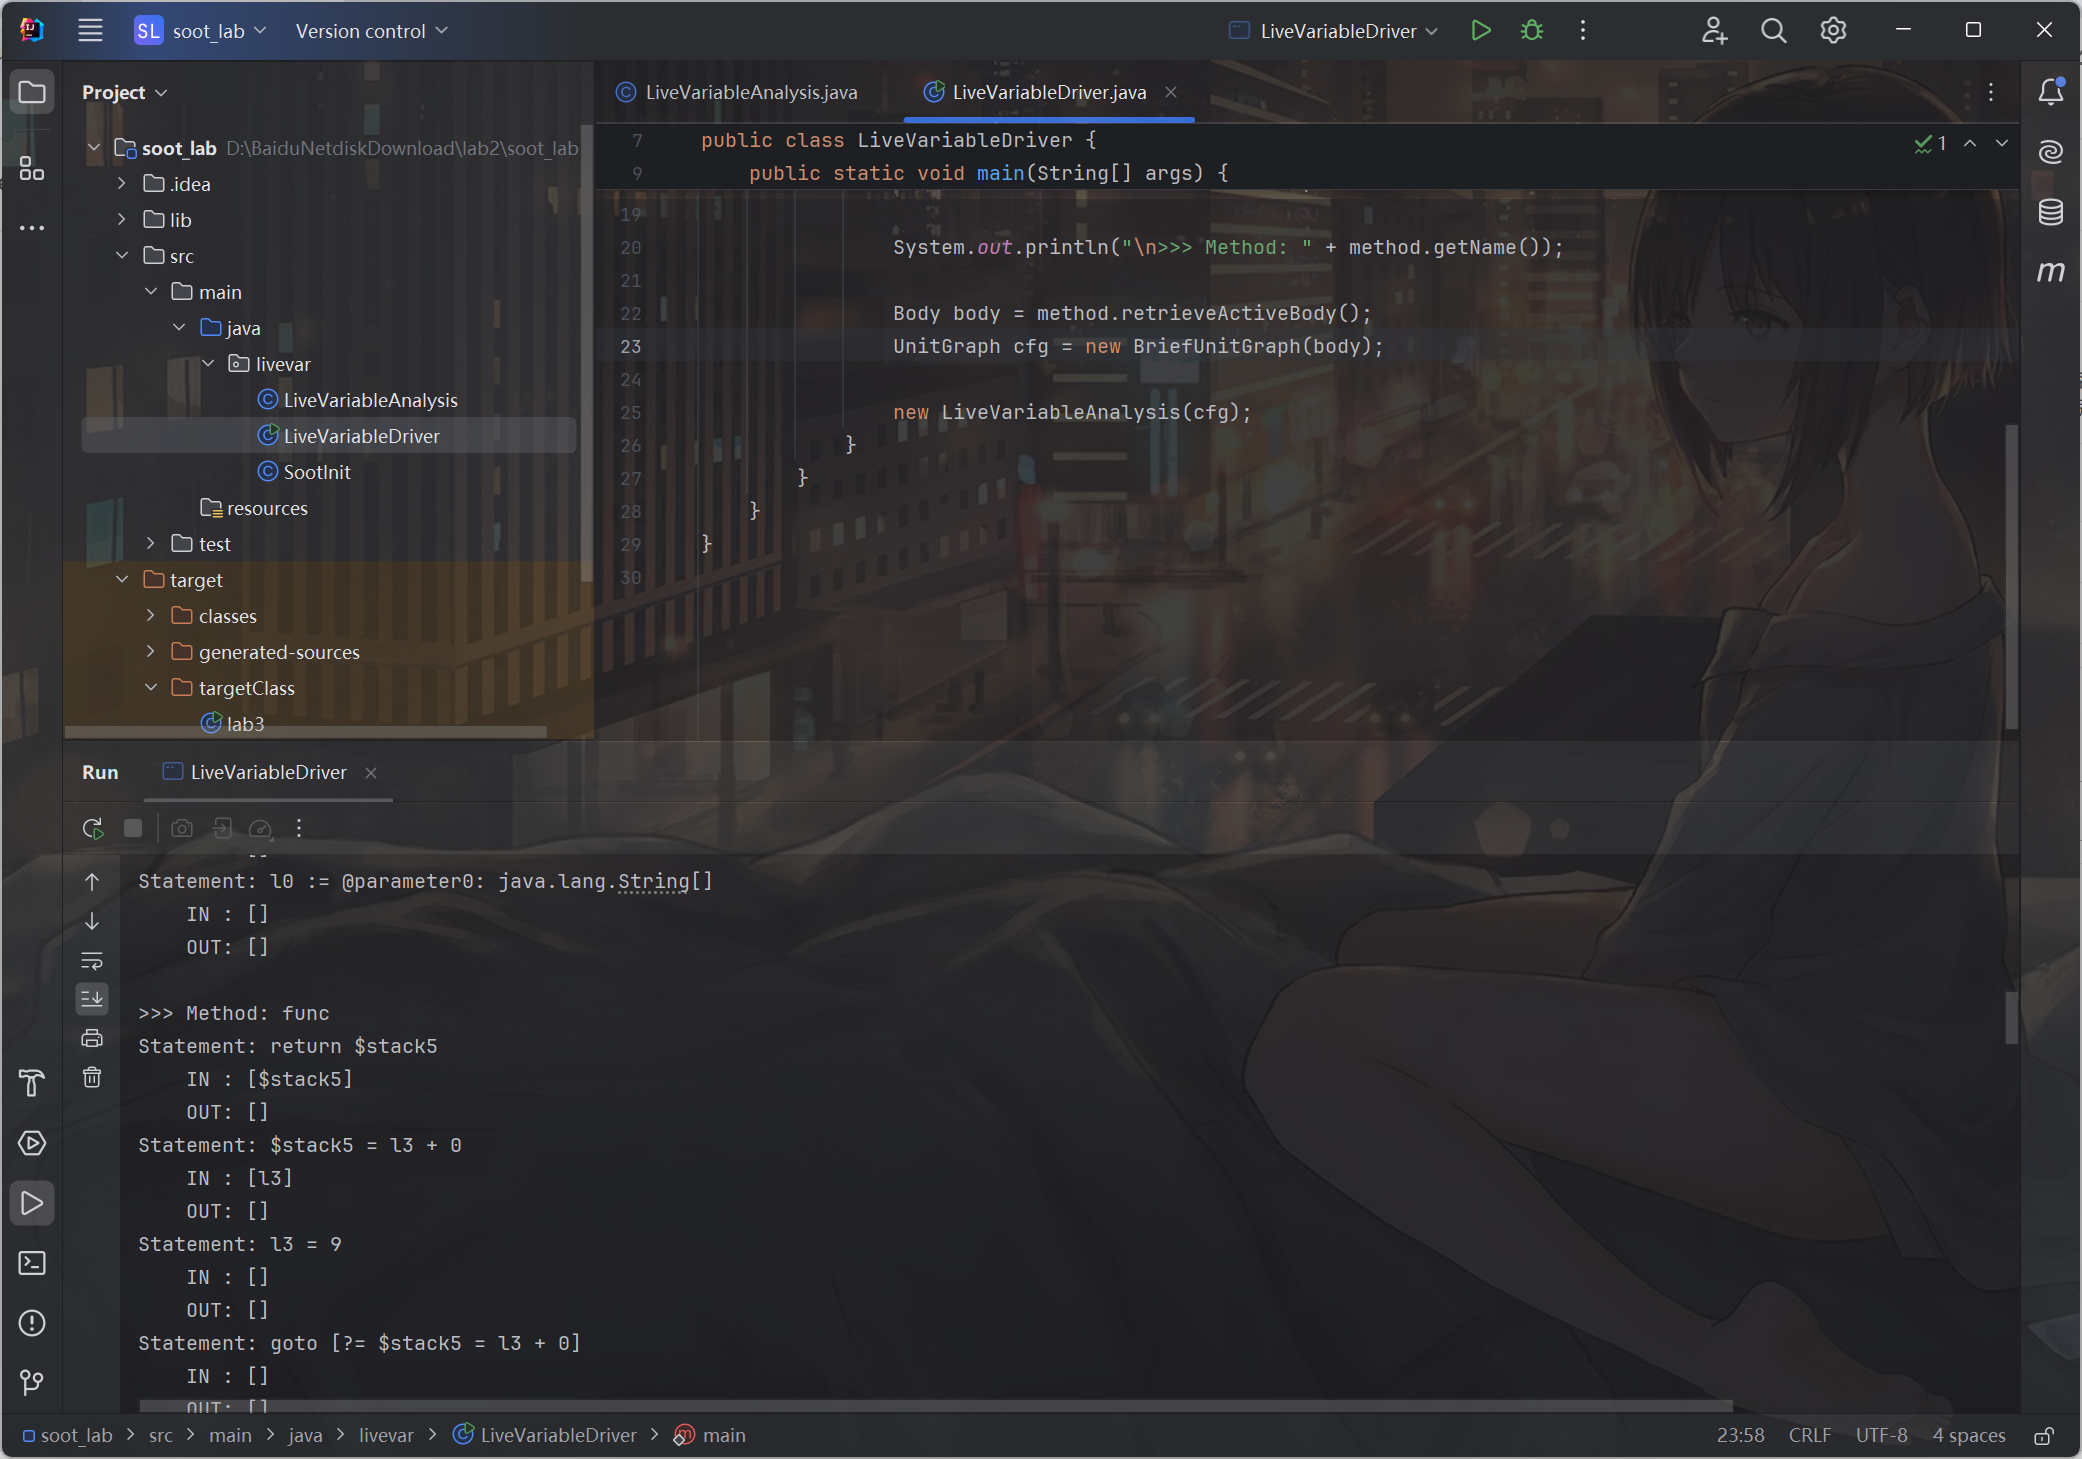
}触发点LiveVariableDriver如下:
package livevar;

import soot.*;
import soot.toolkits.graph.BriefUnitGraph;
import soot.toolkits.graph.UnitGraph;

public class LiveVariableDriver {

    public static void main(String[] args) {
        String inputClassPath = "D:/BaiduNetdiskDownload/lab2/soot_lab/target/targetClass";

        SootInit.setSootInputClass(inputClassPath);

        for (SootClass sc : Scene.v().getApplicationClasses()) {
            System.out.println("\n=== Analyzing class: " + sc.getName() + " ===");

            for (SootMethod method : sc.getMethods()) {
                if (!method.isConcrete()) continue;

                System.out.println("\n>>> Method: " + method.getName());

                Body body = method.retrieveActiveBody();
                UnitGraph cfg = new BriefUnitGraph(body);

                new LiveVariableAnalysis(cfg);
            }
        }
    }
}
Soot ClassPath: D:/BaiduNetdiskDownload/lab2/soot_lab/target/targetClass;D:\Java\jdk1.8.0_202\jre/lib/rt.jar;D:\Java\jdk1.8.0_202\jre\lib\rt.jar;D:\Java\jdk1.8.0_202\jre\lib\jce.jar
✅ Soot初始化完成!

=== Analyzing class: lab3 ===

>>> Method: <init>
Statement: return
    IN : []
    OUT: []
Statement: specialinvoke l0.<java.lang.Object: void <init>()>()
    IN : [l0]
    OUT: []
Statement: l0 := @this: lab3
    IN : []
    OUT: []

>>> Method: main
Statement: return
    IN : []
    OUT: []
Statement: staticinvoke <lab3: void func1(int,int)>($stack2, $stack3)
    IN : [$stack3, $stack2]
    OUT: []
Statement: $stack3 = $stack2 + 10
    IN : [$stack2]
    OUT: []
Statement: $stack2 = staticinvoke <lab3: int func()>()
    IN : []
    OUT: []
Statement: l0 := @parameter0: java.lang.String[]
    IN : []
    OUT: []

>>> Method: func
Statement: return $stack5
    IN : [$stack5]
    OUT: []
Statement: $stack5 = l3 + 0
    IN : [l3]
    OUT: []
Statement: l3 = 9
    IN : []
    OUT: []
Statement: goto [?= $stack5 = l3 + 0]
    IN : []
    OUT: []
Statement: l3 = 11
    IN : []
    OUT: []
Statement: if 5 <= 0 goto l3 = 9
    IN : []
    OUT: []

>>> Method: func1
Statement: return
    IN : []
    OUT: []
Statement: l7[l1] = l2
    IN : [l1, l2, l7]
    OUT: []
Statement: l7[$stack14] = $stack26
    IN : [$stack26, $stack14, l7]
    OUT: []
Statement: $stack26 = l7[l1]
    IN : [l1, l7]
    OUT: []
Statement: l2 = l7[$stack14]
    IN : [$stack14, l7]
    OUT: []
Statement: goto [?= l2 = l7[$stack14]]
    IN : []
    OUT: []
Statement: if $stack14 < $stack21 goto l2 = l7[$stack14]
    IN : [$stack14, $stack21]
    OUT: []
Statement: if $stack18 < l8 goto $stack21 = l6 - 1
    IN : [$stack18, l8]
    OUT: []
Statement: $stack18 = l7[$stack21]
    IN : [l7, $stack21]
    OUT: []
Statement: l6 = $stack21
    IN : [$stack21]
    OUT: []
Statement: $stack21 = l6 - 1
    IN : [l6]
    OUT: []
Statement: if $stack11 < l8 goto $stack14 = l5 + 1
    IN : [$stack11, l8]
    OUT: []
Statement: $stack11 = l7[$stack14]
    IN : [$stack14, l7]
    OUT: []
Statement: l5 = $stack14
    IN : [$stack14]
    OUT: []
Statement: $stack14 = l5 + 1
    IN : [l5]
    OUT: []
Statement: goto [?= $stack14 = l5 + 1]
    IN : []
    OUT: []
Statement: l7[$stack21] = l2
    IN : [l2, l7, $stack21]
    OUT: []
Statement: l7[$stack14] = $stack25
    IN : [$stack14, $stack25, l7]
    OUT: []
Statement: $stack25 = l7[$stack21]
    IN : [l7, $stack21]
    OUT: []
Statement: l2 = l7[$stack14]
    IN : [$stack14, l7]
    OUT: []
Statement: if l9 > l1 goto $stack14 = l5 + 1
    IN : [l1, l9]
    OUT: []
Statement: goto [?= (branch)]
    IN : []
    OUT: []
Statement: l9 = l9 + 1
    IN : [l9]
    OUT: []
Statement: l7[l9] = $stack27
    IN : [$stack27, l7, l9]
    OUT: []
Statement: $stack27 = l9 * 3
    IN : [l9]
    OUT: []
Statement: l9 = 0
    IN : []
    OUT: []
Statement: l8 = l7[l1]
    IN : [l1, l7]
    OUT: []
Statement: l7 = newarray (int)[$stack10]
    IN : [$stack10]
    OUT: []
Statement: $stack10 = l1 + 1
    IN : [l1]
    OUT: []
Statement: l6 = l1
    IN : [l1]
    OUT: []
Statement: l5 = l0 - 1
    IN : [l0]
    OUT: []
Statement: l1 := @parameter1: int
    IN : []
    OUT: []
Statement: l0 := @parameter0: int
    IN : []
    OUT: []
Task 2.死代码消除
任务要求:
- 该实验可以通过两个思路来解决,第一个思路是直接利用控制流提供的信息,比如是否会有方法在CallGraph或者invoke指令上从未出现过,利用这种较为简单的方法,可以移除掉一些从未被调用过的方法,也可以利用条件分支获取的常数信息来判断是否会有分支无法被触发。上文所述的死代码移除方法较为简单,同学们要熟练使用Soot才能灵活实现,该实验主要从类、方法、指令三个角度考察对死代码进行移除的方法。
- 进行过程内分析寻找lab2.apk中的死代码,根据考虑到不同情况死代码的完善程度进行评分
识别无法触发的方法
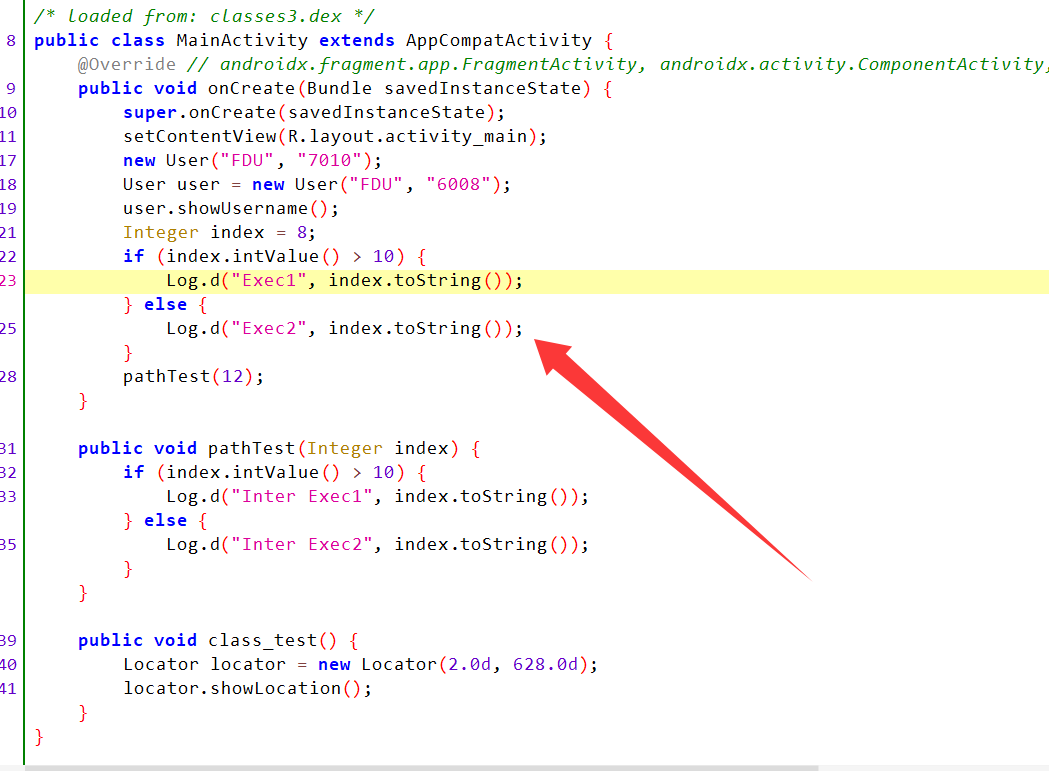
首先我们可以用jadx-gui查看一下这个apk对应的方法,可以看到主要的包是com.example.lab_code,主逻辑是MainActivity:
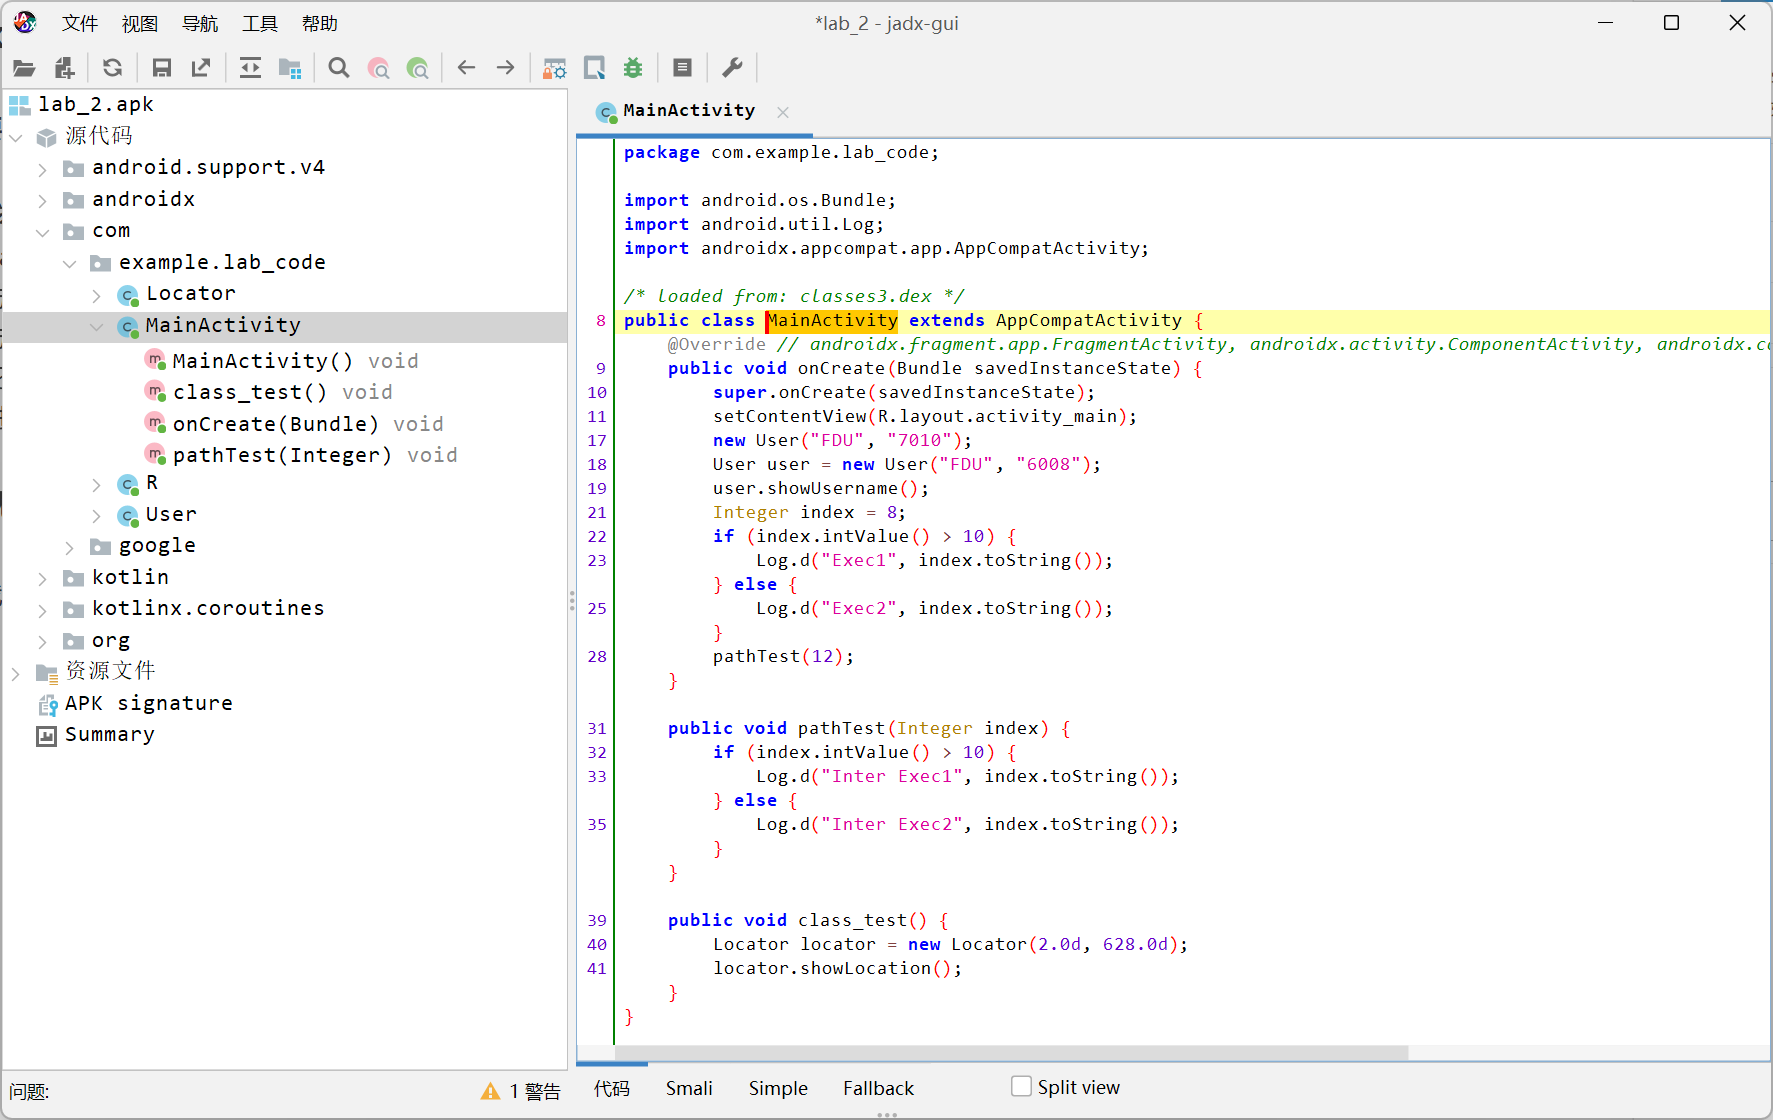


肉眼分析我们可以知道,在主方法onCreate里对应的dead method是class_test、showLocation和changePassword
这里有一个很神奇的事,我之前用spark总是识别不到pathTest那条调用边,导致会把pathTest当作dead method:
最后我选择使用CHA进行分析,然后自己构造EntryPoint方法,也就是手动构造一个dummyMain,里面调用 onCreate():
package livevar;

import soot.*;
import soot.jimple.*;
import java.util.Collections;

public class DummyMainCreator {

    public static SootMethod createDummyMain(String mainClassName) {
        SootClass mainClass = Scene.v().getSootClass(mainClassName);
        SootMethod dummyMain = new SootMethod(
                "dummyMain",
                Collections.emptyList(),
                VoidType.v(),
                Modifier.PUBLIC | Modifier.STATIC
        );

        Scene.v().getSootClass("java.lang.Object").setApplicationClass();
        mainClass.addMethod(dummyMain);

        JimpleBody body = Jimple.v().newBody(dummyMain);
        dummyMain.setActiveBody(body);

        // Local变量
        Local thisLocal = Jimple.v().newLocal("thisLocal", mainClass.getType());
        body.getLocals().add(thisLocal);

        // new MainActivity()
        NewExpr newExpr = Jimple.v().newNewExpr(mainClass.getType());
        AssignStmt assignStmt = Jimple.v().newAssignStmt(thisLocal, newExpr);
        body.getUnits().add(assignStmt);

        // 调用构造函数
        SootMethod initMethod = mainClass.getMethodByName("<init>");
        SpecialInvokeExpr initExpr = Jimple.v().newSpecialInvokeExpr(thisLocal, initMethod.makeRef());
        body.getUnits().add(Jimple.v().newInvokeStmt(initExpr));

        // 调用onCreate(null)
        SootMethod onCreateMethod = mainClass.getMethod("void onCreate(android.os.Bundle)");
        VirtualInvokeExpr onCreateExpr = Jimple.v().newVirtualInvokeExpr(
                thisLocal, onCreateMethod.makeRef(), NullConstant.v()
        );
        body.getUnits().add(Jimple.v().newInvokeStmt(onCreateExpr));

        // return
        body.getUnits().add(Jimple.v().newReturnVoidStmt());

        return dummyMain;
    }
}
初始化的代码如下:
public static void initAPK(String apkPath, String androidJarPath, String mainClassName) {
G.reset();
// 基本配置
Options.v().set_src_prec(Options.src_prec_apk);
Options.v().set_android_jars(androidJarPath);
Options.v().set_process_dir(Collections.singletonList(apkPath));
Options.v().set_whole_program(true);
Options.v().set_allow_phantom_refs(true);
Options.v().set_force_android_jar(androidJarPath + "/android-30/android.jar");
Options.v().set_process_multiple_dex(true);
Options.v().set_output_format(Options.output_format_none);
// Call Graph 设置,使用CHA分析
Options.v().setPhaseOption("cg.cha", "on");
Options.v().set_no_bodies_for_excluded(true);
Scene.v().loadNecessaryClasses();
SootClass mainClass = Scene.v().getSootClassUnsafe(mainClassName, false);
if (mainClass == null) {
throw new RuntimeException("❌ 找不到Main类:" + mainClassName);
}
mainClass.setApplicationClass();
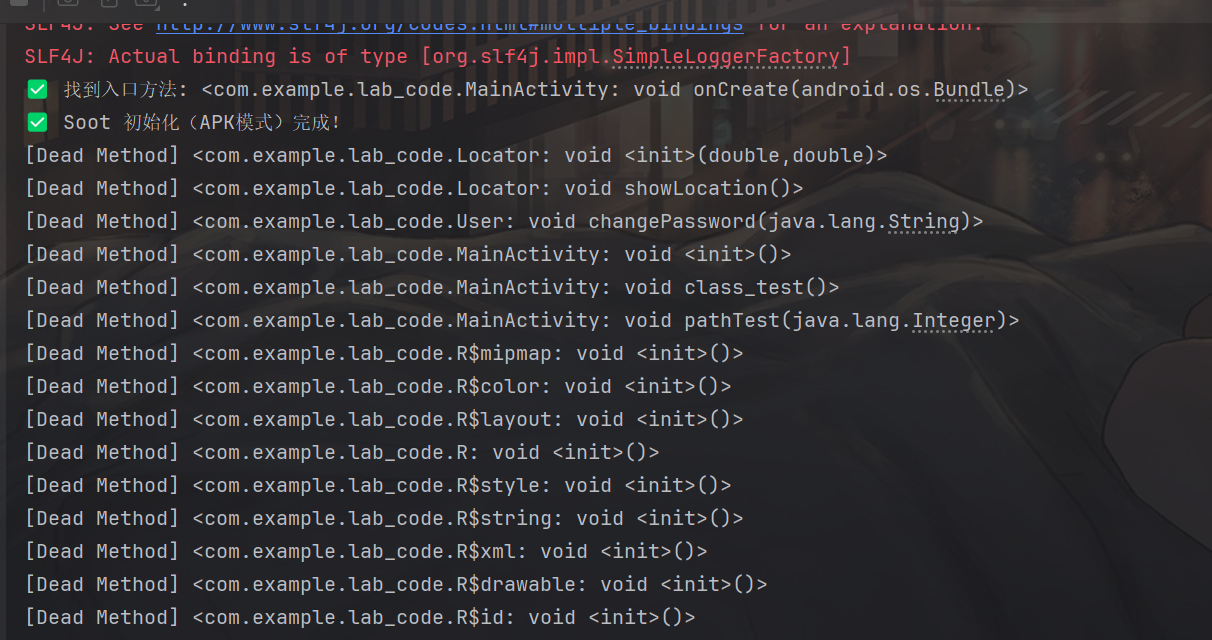
}主逻辑在CallGraphBasedElimination中,主要就是基于Soot框架构建的Call Graph,通过从指定的入口点(onCreate)出发,遍历所有方法的调用关系,找出应用包 com.example.lab_code 中没有被任何路径调用的方法,并将它们判定为Dead Method。这里我手动处理了一下,忽略构造函数<init>,只输出真正未被调用的普通方法:
package livevar;

import soot.*;
import soot.jimple.toolkits.callgraph.CallGraph;
import soot.jimple.toolkits.callgraph.Edge;

import java.util.*;

public class CallGraphBasedElimination {

    public static void analyze() {
        PackManager.v().getPack("cg").apply();
        CallGraph cg = Scene.v().getCallGraph();
//        for (Edge edge : cg) {
//            System.out.println(edge);
//        }

        Set<SootMethod> reachableMethods = new HashSet<>();

        Queue<SootMethod> worklist = new LinkedList<>(Scene.v().getEntryPoints());
        reachableMethods.addAll(worklist);

        while (!worklist.isEmpty()) {
            SootMethod method = worklist.poll();
            Iterator<Edge> edgesOut = cg.edgesOutOf(method);
            while (edgesOut.hasNext()) {
                Edge e = edgesOut.next();
                SootMethod target = e.getTgt().method();
                if (!reachableMethods.contains(target)) {
                    reachableMethods.add(target);
                    worklist.add(target);
                }
            }
        }

        System.out.println("========== Dead Code Detection ==========");

        for (SootClass clazz : Scene.v().getApplicationClasses()) {
            if (!clazz.getName().startsWith("com.example.lab_code")) {
                continue;
            }
            for (SootMethod method : clazz.getMethods()) {
                if (reachableMethods.contains(method)) {
                } else {
                    if (method.isConcrete()&&!method.getName().equals("<init>")) {
                        System.out.println("[Dead Method] " + method.getSignature());
                    }
                }
            }
        }

        System.out.println("✅ Dead code analysis finished.");
    }

}
最后在DeadCodeEliminationDriver进行调用:
package livevar;

import soot.*;

import java.util.Collections;

public class DeadCodeEliminationDriver {
    public static void main(String[] args) {
        // 初始化 Soot
        SootInit.initAPK(
                "D:/BaiduNetdiskDownload/lab2/lab_2.apk",
                "D:/BaiduNetdiskDownload/lab2/android-platforms",
                "com.example.lab_code.MainActivity"
        );

        // 创建 DummyMain
        SootMethod dummyMain = DummyMainCreator.createDummyMain("com.example.lab_code.MainActivity");

        // 设置 EntryPoint
        Scene.v().setEntryPoints(Collections.singletonList(dummyMain));
        System.out.println("✅ EntryPoint 设置为: " + dummyMain.getSignature());

        // Dead Code 分析
        CallGraphBasedElimination.analyze();
    }
}

识别无法触发的分支
从肉眼可以看出来,其实这个onCreate里的if分支其实是恒成立的,永远都只会走这个else:
这里我做的比较丐版,主要是分析if里的判断是否恒成立,完整的代码如下:
package livevar;

import soot.*;
import soot.jimple.*;
import soot.toolkits.graph.Block;
import soot.toolkits.graph.BlockGraph;
import soot.toolkits.graph.BriefBlockGraph;

import java.util.*;

public class BranchBasedElimination {

    public static void analyze() {
        System.out.println("========== Branch-based constant propagation ==========");

        for (SootClass clazz : Scene.v().getApplicationClasses()) {
            if (!clazz.getName().startsWith("com.example.lab_code")) {
                continue;
            }

            for (SootMethod method : clazz.getMethods()) {
                if (!method.isConcrete()) continue;
                if (method.getName().equals("<init>") || method.getName().equals("dummyMain")) continue;

                System.out.println("\n===== 分析方法:" + method.getSignature() + " =====");

                Body body = method.retrieveActiveBody();
                BlockGraph blockGraph = new BriefBlockGraph(body);

                Map<Value, Integer> constants = new HashMap<>();

                for (Block block : blockGraph) {
                    for (Unit unit : block) {
                        Stmt stmt = (Stmt) unit;

                        // 处理赋值语句
                        if (stmt instanceof AssignStmt) {
                            Value left = ((AssignStmt) stmt).getLeftOp();
                            Value right = ((AssignStmt) stmt).getRightOp();

                            Integer value = getValue(right, constants);
                            if (value != null) {
                                constants.put(left, value);
                            }
                        }

                        // 处理if语句
                        if (stmt instanceof IfStmt) {
                            ConditionExpr condition = (ConditionExpr) ((IfStmt) stmt).getCondition();
                            Value op1 = condition.getOp1();
                            Value op2 = condition.getOp2();

                            Integer v1 = getValue(op1, constants);
                            Integer v2 = getValue(op2, constants);

                            if (v1 != null && v2 != null) {
                                boolean result = evalCondition(condition, v1, v2);
                                String branch = result ? "else分支无法触发" : "if分支无法触发";
                                System.out.println("❌ 条件恒为" + result + "," + branch + " : " + stmt);
                            } else {
                                System.out.println("⚠️ 条件无法静态判定: " + stmt);
                            }
                        }
                    }
                }
            }
        }

        System.out.println("\n✅ Branch-based dead code analysis finished.");
    }

    // 获取常量值
    private static Integer getValue(Value val, Map<Value, Integer> constants) {
        if (val instanceof IntConstant) {
            return ((IntConstant) val).value;
        } else if (val instanceof Local) {
            return constants.getOrDefault(val, null);
        } else if (val instanceof VirtualInvokeExpr) {
            VirtualInvokeExpr vInvoke = (VirtualInvokeExpr) val;
            String methodName = vInvoke.getMethodRef().name();

            // 支持 intValue()
            if (methodName.equals("intValue")) {
                Value base = vInvoke.getBase();
                return constants.getOrDefault(base, null);
            }
        } else if (val instanceof StaticInvokeExpr) {
            // 处理 Integer.valueOf(int)
            StaticInvokeExpr sInvoke = (StaticInvokeExpr) val;
            if (sInvoke.getMethodRef().name().equals("valueOf") &&
                    sInvoke.getMethodRef().declaringClass().getName().equals("java.lang.Integer")) {
                Value arg = sInvoke.getArg(0);
                if (arg instanceof IntConstant) {
                    return ((IntConstant) arg).value;
                }
            }
        }
        return null;
    }

    // 判断条件真假
    private static boolean evalCondition(ConditionExpr expr, int v1, int v2) {
        if (expr instanceof GeExpr) {
            return v1 >= v2;
        } else if (expr instanceof GtExpr) {
            return v1 > v2;
        } else if (expr instanceof LeExpr) {
            return v1 <= v2;
        } else if (expr instanceof LtExpr) {
            return v1 < v2;
        } else if (expr instanceof EqExpr) {
            return v1 == v2;
        } else if (expr instanceof NeExpr) {
            return v1 != v2;
        } else {
            throw new RuntimeException("不支持的条件表达式: " + expr);
        }
    }
}
然后用BranchBasedElimination.analyze()调用一下:

不知道为什么soot这里解析的判断语句是if i0 <= 10,不过还是可以看出来因为i0=8,导致这个判断恒为真了,因此对应的else分支永远不可能被触发。