任务说明
- 本实验的目的是帮助学生了解Linux的基本使用。
- 本次实验的题目主要包括三种类型:选择、填空和实战题目
- 注意事项
- 答题需要通过使用ssh连接到远程服务器,e.g. ssh student@ip -p $port
- 每位学生答题时的容器ID是不同的,对应的答案也不同,请勿相互抄袭
选择填空
以下哪些场景必须使用sudo:
- 普通用户运行代码
- 普通用户添加用户
- 普通用户进入root
- 普通用户挂载远程nas
答案
2, 3, 4
解释
- 普通用户运行代码: 普通用户在自己的主目录下拥有权限,运行自己的代码不需要
sudo。 - 普通用户添加用户: 添加用户(如使用
useradd命令)会修改系统的核心配置文件(如/etc/passwd),这是管理系统用户的行为,需要管理员权限,因此必须使用sudo。 - 普通用户进入root:
sudo是”superuser do”的缩写,其核心功能之一就是允许授权用户临时执行需要root权限的命令,包括切换到root用户本身(例如通过sudo su或sudo -i)。 - 普通用户挂载远程nas:
mount命令用于挂载文件系统,这通常需要修改系统级的目录结构和文件系统表,属于系统管理操作,因此需要sudo权限。
近日,某服务器遭到恶意挖矿攻击。在溯源时发现可能是以下几个账号被攻击者爆破,请从以下(用户名,密码)中选取可疑的用户
- dwen, aabbccdd
- abc, qwerty
- xzy, xzy123
- ssr, E2j79qCqCujMWxUEZgGj
答案
1, 2, 3
解释
- 第一个似乎全是rockyou里的
- abc是常见的用户名,qwerty更是非常常见的密码,因此可能被爆破
- xzy看起来应该是某个人的名字首字母组合,xzy123就是一个简单的社工密码
以下哪些命令可以在linux系统中编辑文件
- vi/vim
- nano
- cat
- awk
答案
1, 2
解释
- vi/vim:
vim是一个功能强大的文本编辑器,是Linux系统下最常用的编辑器之一。 - nano:
nano是一个对新手非常友好的、简单易用的命令行文本编辑器。 - cat:
cat主要用于查看文件内容或将多个文件连接起来输出。虽然可以通过重定向符(cat > file)来创建新文件并写入内容,但它不能用于交互式地编辑一个已存在的文件。 - awk:
awk是一种强大的文本处理工具,用于扫描和处理文本行。它可以用来修改文本内容,但它是通过编程脚本的方式,而不是作为一个交互式编辑器。
有哪些方法可以在后台持续运行代码,即便已经连接的SSH会话关闭了
- tmux
- nohup
- &
- screen
答案
1, 2, 3, 4
解释
- tmux: 是一个终端复用器(Terminal Multiplexer),可以创建多个会话,并且可以从会话中“分离”(detach)。即使SSH断开连接,
tmux会话和其中运行的程序也会继续在服务器后台运行。 - nohup:
nohup命令可以使一个命令忽略挂起(hangup)信号。通常与&结合使用(nohup command &),这样当SSH会话关闭时,进程不会被终止,并且其输出会默认重定向到nohup.out文件中。 - screen: 与
tmux类似,screen也是一个经典的终端复用器,允许用户创建并管理多个终端会话,并在断开SSH后保持会话和程序的运行。 - &: 单独使用
&符号只是将命令放入当前shell会话的后台运行。当这个SSH会话关闭时,会话中的所有进程(包括后台进程)通常都会收到SIGHUP(挂断)信号并终止。
以下哪些工具可以用于监听并分析流量
- Wireshark
- Nessus
- Tcpdump
- Burp Suite
答案
1, 3, 4
解释
- Wireshark: 是一个非常著名的网络协议分析器,拥有图形化界面,可以捕获网络数据包并以非常详细和易于理解的方式展示各层协议的数据。
- Nessus: 是一个漏洞扫描工具,用于检测网络中的主机有哪些安全漏洞,而不是用于实时监听和分析网络流量的工具。
- Tcpdump: 是一个强大的命令行抓包工具。它可以在服务器上捕获和分析网络流量,非常适合在没有图形界面的远程服务器上使用。
- Burp Suite: 主要是一个用于Web应用安全测试的集成平台(HTTP代理工具),它拦截和分析的是应用层(主要是HTTP/HTTPS)的流量。
我们在个人主机/服务器使用过程中常说的存储空间是指 _
答案
磁盘空间
解释
通常我们所说的“存储空间”或“容量”指的是计算机的硬盘(HDD)或固态硬盘(SSD)上可用于长期存放操作系统、软件和用户数据的空间,即磁盘空间
列举两个常见的服务以及对应的默认端口,例如http:80, _ 和 _
答案
mysql:3306
ssh:22
解释
顾名思义
判断一个服务器地址是否失联的最简单的命令是 _
答案
ping
解释
ping 命令通过发送ICMP Echo Request报文到目标主机并等待其响应,来检测网络连接是否通畅以及测量延迟,是网络诊断中最基本、最常用的命令
在不使用sudo的情况下,列举两种普通用户配置python依赖的pypi包的两种方法:_ 和 _
答案
使用虚拟环境 (venv/virtualenv) 和 使用 pip install --user
解释
- 虚拟环境 (Virtual Environments): 使用
python -m venv myenv等命令可以创建一个独立的Python环境。激活该环境后,用户可以在其中自由地使用pip安装包,这些包会被安装到这个虚拟环境的目录中,不会影响系统全局的Python环境,因此不需要sudo。 - 用户模式安装 (
--user): 使用pip install --user <package_name>命令,pip会将包安装到用户的主目录下一个特定的位置(如~/.local/lib/pythonX.Y/site-packages)。因为操作是在用户自己的目录下,所以不需要管理员权限。
列举至少两种查看当前机器下面的端口开放/使用情况的命令:_ 和 _
答案
netstat -tuln 和 ss -tuln
解释
- netstat: 是一个经典的用于显示网络连接、路由表、接口统计等信息的工具。
netstat -tuln是一个常用组合,表示显示TCP (t)、UDP (u) 的监听 (l) 端口,并以数字形式 (n) 显示地址和端口号。 - ss: 是
netstat的现代替代品,功能更强大且速度更快。ss -tuln的参数含义与netstat类似,是目前在Linux系统上更推荐使用的命令。
实战题目
Task0: 签到
任务要求:使用ssh连接到远程服务器,并运行指定目录下面的二进制文件,即可获取flag
具体过程
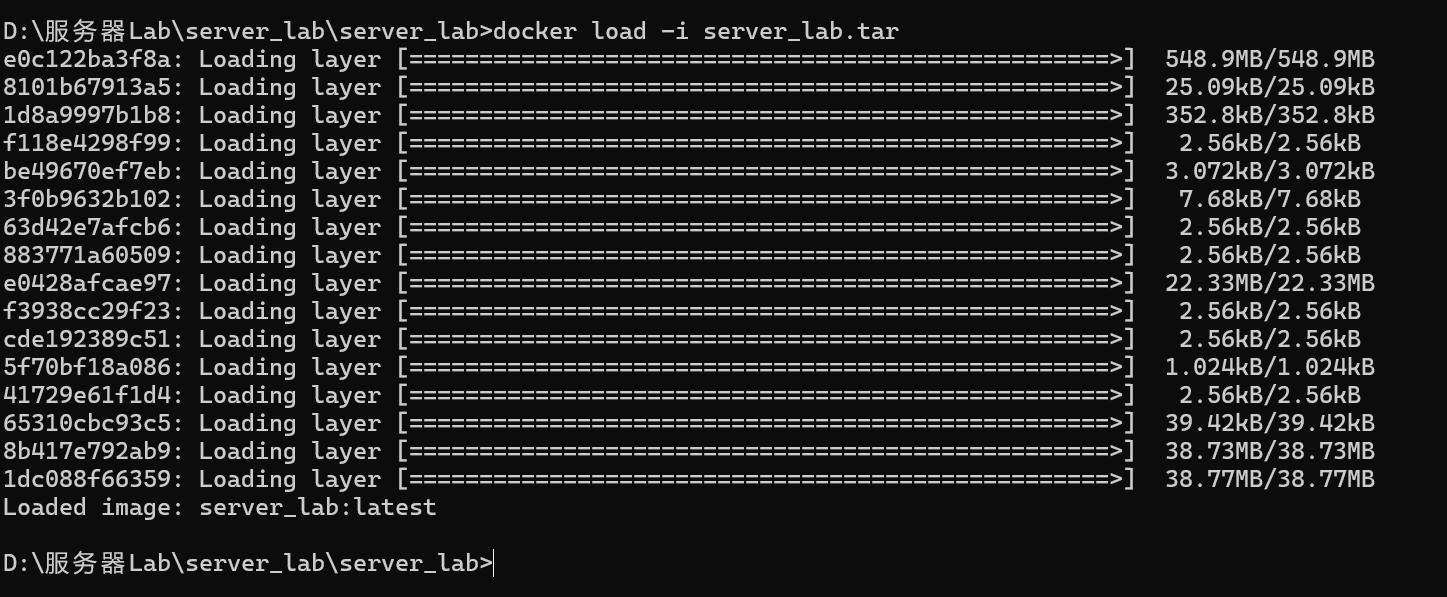
docker load -i server_lab.tar
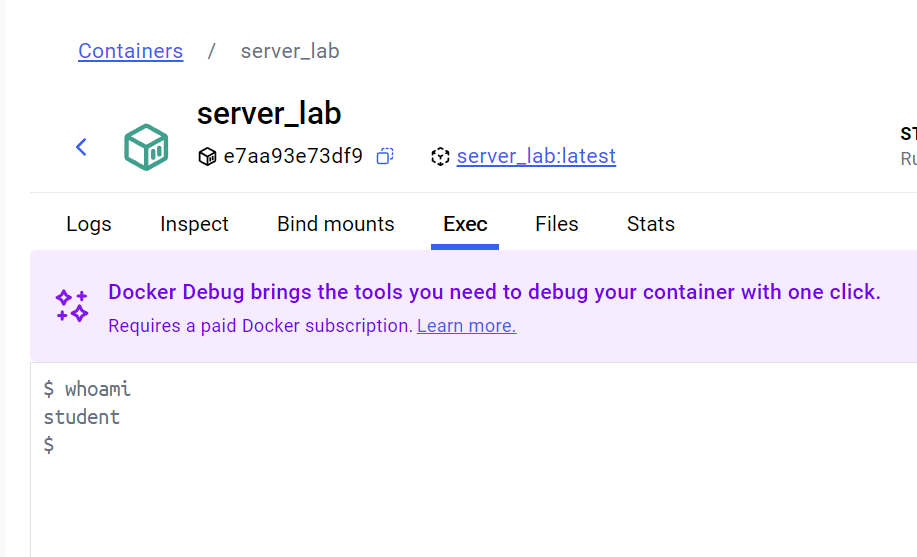
docker run --name server_lab -it -d server_lab

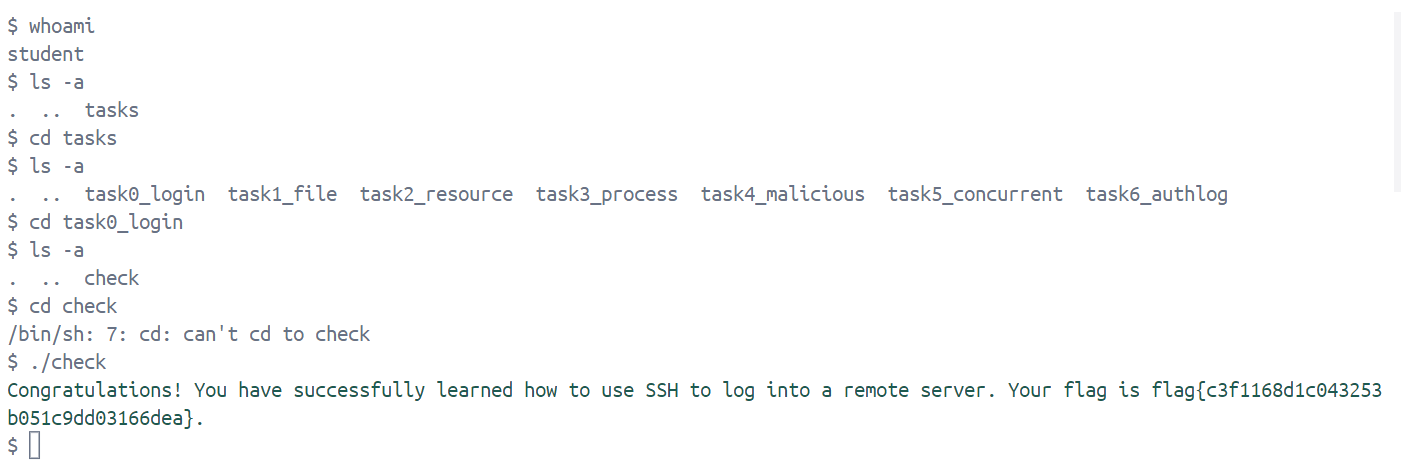
Congratulations! You have successfully learned how to use SSH to log into a remote server. Your flag is flag{c3f1168d1c043253b051c9dd03166dea}.
Task1: 文件操作
任务要求:通过执行命令使得文件夹/home/student/data 和 /mnt/examdata 保持相同的读写行为
具体过程
这里我们通过创建一个软链接来让两个路径表现得一致,即访问或写入其中一个目录时,实际操作的是另一个目录的内容:
ln -s /mnt/examdata /home/student/data

Check passed! Flag: flag{6f21794a59dda918e461a78e89f22b38}
Task2: 资源查看
任务目的:了解常用的查看资源的命令与方法
具体过程
student@e7aa93e73df9:/opt/tasks/task2_resource$ history -w
student@e7aa93e73df9:/opt/tasks/task2_resource$ free -h
total used free shared buff/cache available
Mem: 31Gi 711Mi 29Gi 4.0Mi 726Mi 30Gi
Swap: 8.0Gi 0B 8.0Gi
student@e7aa93e73df9:/opt/tasks/task2_resource$ cat /proc/meminfo
MemTotal: 32700540 kB
MemFree: 31232148 kB
MemAvailable: 31629880 kB
Buffers: 20988 kB
Cached: 641132 kB
SwapCached: 0 kB
Active: 128128 kB
Inactive: 779504 kB
Active(anon): 2472 kB
Inactive(anon): 248068 kB
Active(file): 125656 kB
Inactive(file): 531436 kB
Unevictable: 0 kB
Mlocked: 0 kB
SwapTotal: 8388608 kB
SwapFree: 8388608 kB
Dirty: 60 kB
Writeback: 0 kB
AnonPages: 246068 kB
Mapped: 222548 kB
Shmem: 4592 kB
KReclaimable: 82060 kB
Slab: 207804 kB
SReclaimable: 82060 kB
SUnreclaim: 125744 kB
KernelStack: 9216 kB
PageTables: 4096 kB
SecPageTables: 0 kB
NFS_Unstable: 0 kB
Bounce: 0 kB
WritebackTmp: 0 kB
CommitLimit: 24738876 kB
Committed_AS: 1723560 kB
VmallocTotal: 34359738367 kB
VmallocUsed: 38232 kB
VmallocChunk: 0 kB
Percpu: 13184 kB
HardwareCorrupted: 0 kB
AnonHugePages: 0 kB
ShmemHugePages: 0 kB
ShmemPmdMapped: 0 kB
FileHugePages: 0 kB
FilePmdMapped: 0 kB
Unaccepted: 0 kB
HugePages_Total: 0
HugePages_Free: 0
HugePages_Rsvd: 0
HugePages_Surp: 0
Hugepagesize: 2048 kB
top - 15:23:00 up 7:31, 0 users, load average: 0.08, 0.04, 0.00
Tasks: 9 total, 1 running, 7 sleeping, 0 stopped, 1 zombie
%Cpu(s): 0.0 us, 0.2 sy, 0.0 ni, 99.8 id, 0.0 wa, 0.0 hi, 0.0 si, 0.0 st
MiB Mem : 31934.1 total, 30500.3 free, 707.1 used, 726.8 buff/cache
MiB Swap: 8192.0 total, 8192.0 free, 0.0 used. 30889.1 avail Mem
PID USER PR NI VIRT RES SHR S %CPU %MEM TIME+ COMMAND
1 student 20 0 4116 3072 2816 S 0.0 0.0 0:00.47 .entrypoint.sh
9 root 20 0 12196 3108 2304 S 0.0 0.0 0:00.00 sshd
10 student 20 0 13580 9728 5632 S 0.0 0.0 0:00.04 [kworker/u8:2-e
11 student 20 0 12140 7936 5376 S 0.0 0.0 0:00.01 python
13 student 20 0 0 0 0 Z 0.0 0.0 0:00.00 python
102 student 20 0 2616 1280 1280 S 0.0 0.0 0:00.01 sh
1250 student 20 0 4252 3328 2816 S 0.0 0.0 0:00.01 bash
1378 student 20 0 2516 1280 1280 S 0.0 0.0 0:00.00 sleep
1379 student 20 0 6116 2816 2560 R 0.0 0.0 0:00.00 top
student@e7aa93e73df9:/opt/tasks/task2_resource$ mpstat
Linux 6.6.87.2-microsoft-standard-WSL2 (e7aa93e73df9) 07/25/25 _x86_64_ (32 CPU)
15:23:07 CPU %usr %nice %sys %iowait %irq %soft %steal %guest %gnice %idle
15:23:07 all 0.03 0.00 0.04 0.01 0.00 0.00 0.00 0.00 0.00 99.92
student@e7aa93e73df9:/opt/tasks/task2_resource$ ./check
Task Overview:
- Run ≥2 commands to check memory usage
- Run ≥2 commands to check disk usage
- Run ≥2 commands to check CPU usage
Important: After running the required commands, make sure to run 'history -w' before executing this script, otherwise the check may fail!
All checks passed! Flag: flag{a1a228d445780aeaed3ccc20f2c674bc}!
student@e7aa93e73df9:/opt/tasks/task2_resource$
Task3: 进程管理
任务目的:掌握进程查询与释放的基本方法,了解僵尸进程
具体过程
僵尸进程是状态为 Z 的进程,说明它已经终止但其父进程没有调用 wait() 回收资源,所以我们需要先查找该状态的进程,然后杀死他的父进程,以此消灭僵尸进程
student@e7aa93e73df9:/opt/tasks/task3_process$ history -w
student@e7aa93e73df9:/opt/tasks/task3_process$ ps aux | grep 'Z'
USER       PID %CPU %MEM    VSZ   RSS TTY      STAT START   TIME COMMAND
student     13  0.0  0.0      0     0 pts/0    Z+   15:08   0:00 [python] <defunct>
student   1550  0.0  0.0   1036     0 pts/1    D+   15:25   0:00 grep --color=auto Z
student@e7aa93e73df9:/opt/tasks/task3_process$ ps -eo pid,ppid,state,comm | grep ' Z'
   13    11 Z python <defunct>
student@e7aa93e73df9:/opt/tasks/task3_process$ kill -9 11
student@e7aa93e73df9:/opt/tasks/task3_process$ ps -eo pid,ppid,state,comm | grep ' Z'
student@e7aa93e73df9:/opt/tasks/task3_process$ ./check
Your task is to find zombie processes and kill them.
Important: After running the required commands, make sure to run 'history -w' before executing this script, otherwise the check may fail!
Check failed. Please ensure you have queried zombies, killed the parent process, and zombies are gone.
student@e7aa93e73df9:/opt/tasks/task3_process$ cat tail ~/.bash_history
cat: tail: No such file or directory
history -w
history
free -h
cat /proc/meminfo
df -h
du -sh /home/student`
du -sh /home/student
top
mpstat
./check
history -w
free -h
cat /proc/meminfo
df -h
du -sh /home/student
top
mpstat
./check
cd ..
ls -a
cd task3_process/
ls -a
history -w
student@e7aa93e73df9:/opt/tasks/task3_process$ history -w
student@e7aa93e73df9:/opt/tasks/task3_process$ ps -eo pid,ppid,state,comm | grep ' Z'
student@e7aa93e73df9:/opt/tasks/task3_process$ kill -9 11
bash: kill: (11) - No such process
student@e7aa93e73df9:/opt/tasks/task3_process$ tail ~/.bash_history
cd task3_process/
ls -a
history -w
ps aux | grep 'Z'
ps -eo pid,ppid,state,comm | grep ' Z'
kill -9 11
ps -eo pid,ppid,state,comm | grep ' Z'
./check
cat tail ~/.bash_history
history -w
student@e7aa93e73df9:/opt/tasks/task3_process$ ./check
Your task is to find zombie processes and kill them.
Important: After running the required commands, make sure to run 'history -w' before executing this script, otherwise the check may fail!
All checks passed! Flag: flag{c7d9b860237e39e46d69017cf5ca3a61}!
Task4: 恶意进程
任务目的:了解恶意进程的伪装方法以及基本的溯源
具体过程
student@e7aa93e73df9:/opt/tasks/task4_malicious$ ps -eo pid,user,cmd --sort=start_time
  PID USER     CMD
    1 student  /bin/bash /tmp/.entrypoint.sh tail -f /dev/null
    9 root     sshd: /usr/sbin/sshd [listener] 0 of 10-100 startups
   10 student  [kworker/u8:2-events]
  102 student  /bin/sh
 1250 student  bash
 2345 student  sleep 1
 2346 student  ps -eo pid,user,cmd --sort=start_time
kworker 是 Linux 内核的工作线程(kernel worker threads),用于执行内核的后台任务,但真正的内核线程应该是由内核创建的,并且其用户(USER)应该是 root。然而,这个进程的用户是 student,所以很显然这就是那个恶意进程,伪装的COMMAND也就是 [kworker/u8:2-events]
ps 命令显示的 CMD 是可以被程序自身修改的,因此不可信,我们需要去/proc找到它真正的可执行文件和启动命令。由于进程的可执行文件是一个指向 /proc/<PID>/exe 的符号链接,我们可以使用 ls -l 命令来查看它指向的真实文件
student@e7aa93e73df9:/opt/tasks/task4_malicious$ ls -l /proc/10/exe
lrwxrwxrwx 1 student student 0 Jul 25 15:39 /proc/10/exe -> /usr/bin/python3.8
但这里没有展示真正的命令参数,不过我们可以猜出来,他既然用的python,执行的肯定也是python文件,在环境里搜索了一下.py文件, 最后在tmp目录找到目标:
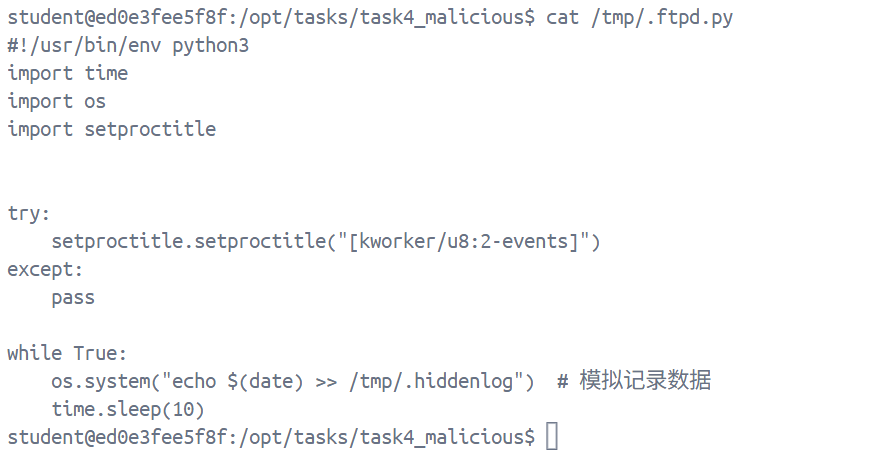
最后猜了一下,命令应该是python /tmp/.ftpd.py,最后杀死一下进程即可:
kill -9 10
student@ed0e3fee5f8f:/opt/tasks/task4_malicious$ kill -9 10
student@ed0e3fee5f8f:/opt/tasks/task4_malicious$ ./check
Task: Analyze and eliminate a malicious process.
Please enter your findings:
1. What is the disguised process name (COMMAND)? [kworker/u8:2-events]
Correct.
2. What is the real command running behind it? python /tmp/.ftpd.py
Correct.
All checks passed. Flag: flag{b16441296d5bbf5793c822488a61a20d}.
student@ed0e3fee5f8f:/opt/tasks/task4_malicious$
Task5: 并行操作
任务目的:了解并掌握常用的并行操作,提高代码运行效率
具体过程
test.py 目前是 串行执行 的,每次调用 worker(i) 都会阻塞 1 秒,所以运行总耗时大约是 15 秒
student@e7aa93e73df9:/opt/tasks/task5_concurrent$ cp template.py test.py
student@e7aa93e73df9:/opt/tasks/task5_concurrent$ cat test.py
import time
import threading
total = 0
start_time = time.time()
lock = threading.Lock()
def worker(num):
global total
with lock:
total += num
time.sleep(1)
# ======= DO NOT MODIFY ABOVE =======
def main():
# ======= You may ONLY modify this section to implement concurrency =======
for i in range(1, 16):
worker(i)
# ====================================================================
# ======= DO NOT MODIFY BELOW =======
end_time = time.time()
elapsed = end_time - start_time
print(f"Total: {total}")
print(f"Elapsed time: {elapsed:.2f} seconds")
if __name__ == "__main__":
main()
这里我们用threading.Thread实现并发,修改后的代码如下:
import time
import threading
total = 0
start_time = time.time()
lock = threading.Lock()
def worker(num):
global total
with lock:
total += num
time.sleep(1)
# ======= DO NOT MODIFY ABOVE =======
def main():
# ======= You may ONLY modify this section to implement concurrency =======
threads = []
for i in range(1, 16):
t = threading.Thread(target=worker, args=(i,))
t.start()
threads.append(t)
for t in threads:
t.join()
# ====================================================================
# ======= DO NOT MODIFY BELOW =======
end_time = time.time()
elapsed = end_time - start_time
print(f"Total: {total}")
print(f"Elapsed time: {elapsed:.2f} seconds")
if __name__ == "__main__":
main()
student@e7aa93e73df9:/opt/tasks/task5_concurrent$ ./check
Task: Optimize the addition of numbers using concurrency in template.py.
!!! Important !!! Do NOT modify template.py directly. You may copy it and modify the copy instead.
Your solution must:
1. Only modify the marked section.
2. Do NOT modify the variable 'total' outside the worker() function.
3. Complete execution within 5 seconds.
Enter the path to your Python solution file: ./test.py
[LOG] Script completed in 1.01 seconds with correct total.
Final Result:
All checks passed. Flag: flag{b4422662626f04927c2f8e03b222d264}.
student@e7aa93e73df9:/opt/tasks/task5_concurrent$
Task6: 日志溯源
任务目的:了解基本的日志溯源方法以及常见的爆破攻击
具体过程
日志里查询”Failed password”关键词,然后按ip排序,这个第一个显然就是目标了
student@e7aa93e73df9:/opt/tasks$ grep "Failed password" /var/log/auth.log | awk '{for(i=1;i<=NF;i++) if ($i=="from") print $(i+1)}' | sort | uniq -c | sort -nr
     60 45.33.32.156
      4 172.16.0.66
      4 103.48.162.68
      3 78.52.226.17
      3 197.2.236.156
      3 192.168.1.41
      3 172.16.0.53
      3 10.0.0.98
      3 10.0.0.6
      2 99.109.142.2
      2 93.4.178.234
      2 200.13.133.39
      2 193.28.93.35
      2 192.168.1.72
      2 192.168.1.65
      2 192.168.1.53
      2 192.168.1.48
      2 192.168.1.18
      2 172.16.0.84
      2 172.16.0.82
      2 172.16.0.80
      2 172.16.0.70
      2 172.16.0.60
      2 172.16.0.56
      2 172.16.0.54
      2 172.16.0.39
      2 172.16.0.23
      2 172.16.0.10
      2 167.250.218.91
      2 152.248.72.188
      2 146.53.82.183
      2 128.217.120.10
      2 113.182.221.92
      2 106.55.93.51
      2 10.0.0.56
      2 10.0.0.45
      2 10.0.0.17
      1 99.44.62.139
      1 94.59.118.211
      1 74.136.150.170
      1 50.8.226.132
      1 45.159.235.36
      1 42.155.201.247
      1 37.66.203.171
      1 36.190.19.109
      1 31.192.136.45
      1 30.184.148.221
      1 30.102.252.129
      1 29.103.44.150
      1 213.184.101.176
      1 192.168.1.90
      1 192.168.1.81
      1 192.168.1.8
      1 192.168.1.70
      1 192.168.1.67
      1 192.168.1.52
      1 192.168.1.42
      1 192.168.1.39
      1 192.168.1.37
      1 192.168.1.30
      1 192.168.1.3
      1 192.168.1.29
      1 192.168.1.28
      1 192.168.1.27
      1 192.168.1.22
      1 192.168.1.14
      1 192.168.1.12
      1 192.168.1.10
      1 173.118.224.22
      1 172.16.0.99
      1 172.16.0.97
      1 172.16.0.93
      1 172.16.0.91
      1 172.16.0.90
      1 172.16.0.9
      1 172.16.0.87
      1 172.16.0.85
      1 172.16.0.78
      1 172.16.0.77
      1 172.16.0.76
      1 172.16.0.75
      1 172.16.0.74
      1 172.16.0.73
      1 172.16.0.68
      1 172.16.0.65
      1 172.16.0.64
      1 172.16.0.61
      1 172.16.0.58
      1 172.16.0.52
      1 172.16.0.49
      1 172.16.0.46
      1 172.16.0.4
      1 172.16.0.37
      1 172.16.0.36
      1 172.16.0.35
      1 172.16.0.34
      1 172.16.0.28
      1 172.16.0.27
      1 172.16.0.25
      1 172.16.0.21
      1 172.16.0.2
      1 172.16.0.13
      1 169.230.110.236
      1 16.107.216.222
      1 156.242.1.157
      1 153.103.245.108
      1 132.77.9.176
      1 129.242.228.78
      1 126.223.210.162
      1 10.0.0.97
      1 10.0.0.95
      1 10.0.0.93
      1 10.0.0.91
      1 10.0.0.9
      1 10.0.0.89
      1 10.0.0.87
      1 10.0.0.84
      1 10.0.0.83
      1 10.0.0.81
      1 10.0.0.75
      1 10.0.0.71
      1 10.0.0.63
      1 10.0.0.52
      1 10.0.0.47
      1 10.0.0.46
      1 10.0.0.4
      1 10.0.0.39
      1 10.0.0.38
      1 10.0.0.35
      1 10.0.0.32
      1 10.0.0.30
      1 10.0.0.27
      1 10.0.0.22
      1 10.0.0.2
      1 10.0.0.19
      1 10.0.0.16
      1 10.0.0.12
      1 10.0.0.11
student@e7aa93e73df9:/opt/tasks$ cd task6_authlog/
student@e7aa93e73df9:/opt/tasks/task6_authlog$ ./check
Your task: Analyze the SSH log and identify the IP address that attempted unauthorized access to the system.
Instructions:
- The log file is located at: /var/log/auth.log
- Use tools like grep, awk, cut, sort, uniq to assist your investigation.
- Once identified, report the offending IP address (we will auto-check your result).
Please enter the suspicious IP: 45.33.32.156
Correct! Flag: flag{974a2f109cf727e5bfe85d6293c9c800}.
Task7: Git使用
只用做五道remote对应的关卡
remoteAdvance1
具体任务是把三个特性分支 side1 side2 和 side3 按顺序推送到远程仓库,那么我们只需要用git rebase依次把当前目标推送到最新提交上即可:

remoteAdvance2
这一关的任务和上一关类似,只是需要我们用merge实现,那照猫画虎即可:

remoteAdvance3
这一关需要我们在不切换到 main 分支的情况下将工作推送到的远程仓库中的 main 分支上
首先用git checkout -b side o/main基于远程分支 o/main 创建并切换到一个新分支 side,接着git commit一下推送更新,然后用git pull --rebase从远程当前分支拉取更新,最后用git push将本地分支推送到远程

remoteAdvance4
这关需要更新远程仓库中的 foo 和 main, 但是 git checkout 被禁用了,就用git push origin xx更新一下即可

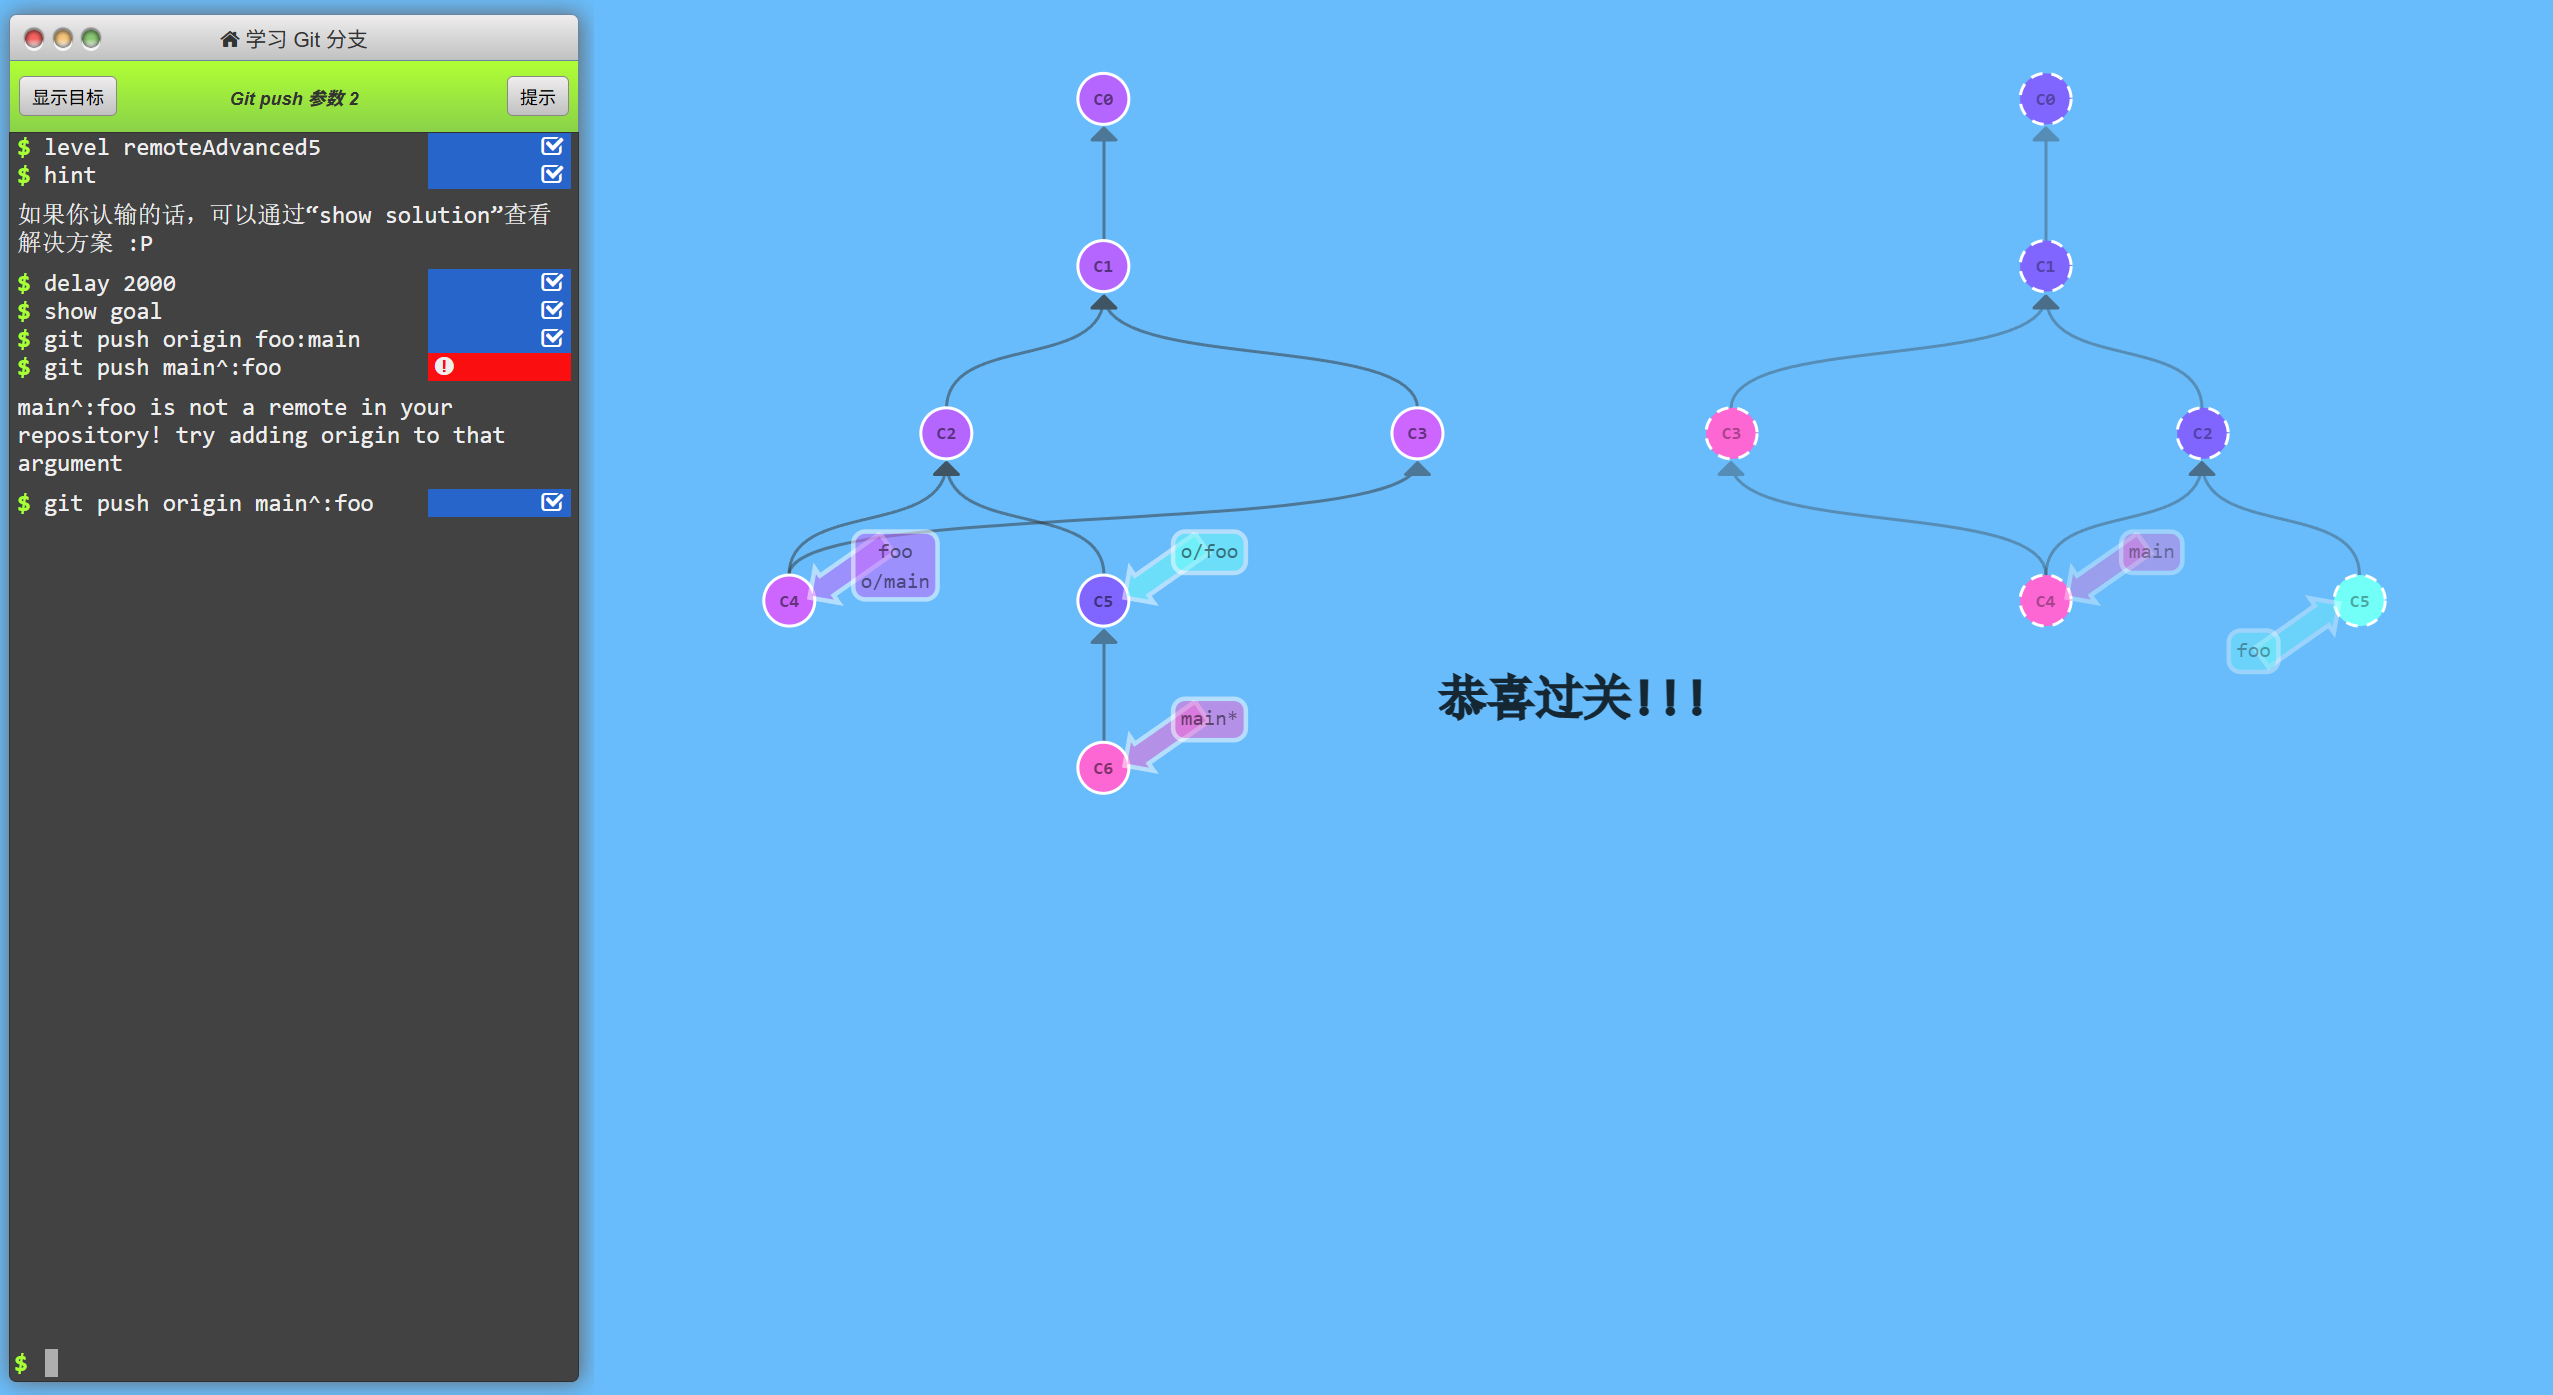
remoteAdvance5
先git push origin foo:main再git push main^:foo
flag{SUaQ9KmX3xbkFQYaspeCYvS7}